
How to Set Up Nginx Proxy Manager in Home Assistant
If you wish to have secure connections to Home Assistant, a reverse proxy may be used. The proxy can reside on the same system (as demonstrated in this guide) or on another system as I have demonstrated in a previous guide. The Nginx Proxy Manager (NPM) provides an easy to use interface to manage all of your proxied services. NPM can even generate and keep up to date Let’s Encrypt certificates. One advantage of setting up NPM on the same system as Home Assistant is that you do not need to worry about the security of the backend system since the backend would be using unsecure HTTP even though the front end is secure with HTTPS.
The instructions for setting up NPM on the add-on store page omits one important aspect to properly setting up NPM. Newer versions of Home Assistant require configuration to trust connections from the reverse proxy. Likely this is a security feature, but it is an extra hurdle to jump over in order to secure access to Home Assistant.
Install MariaDB
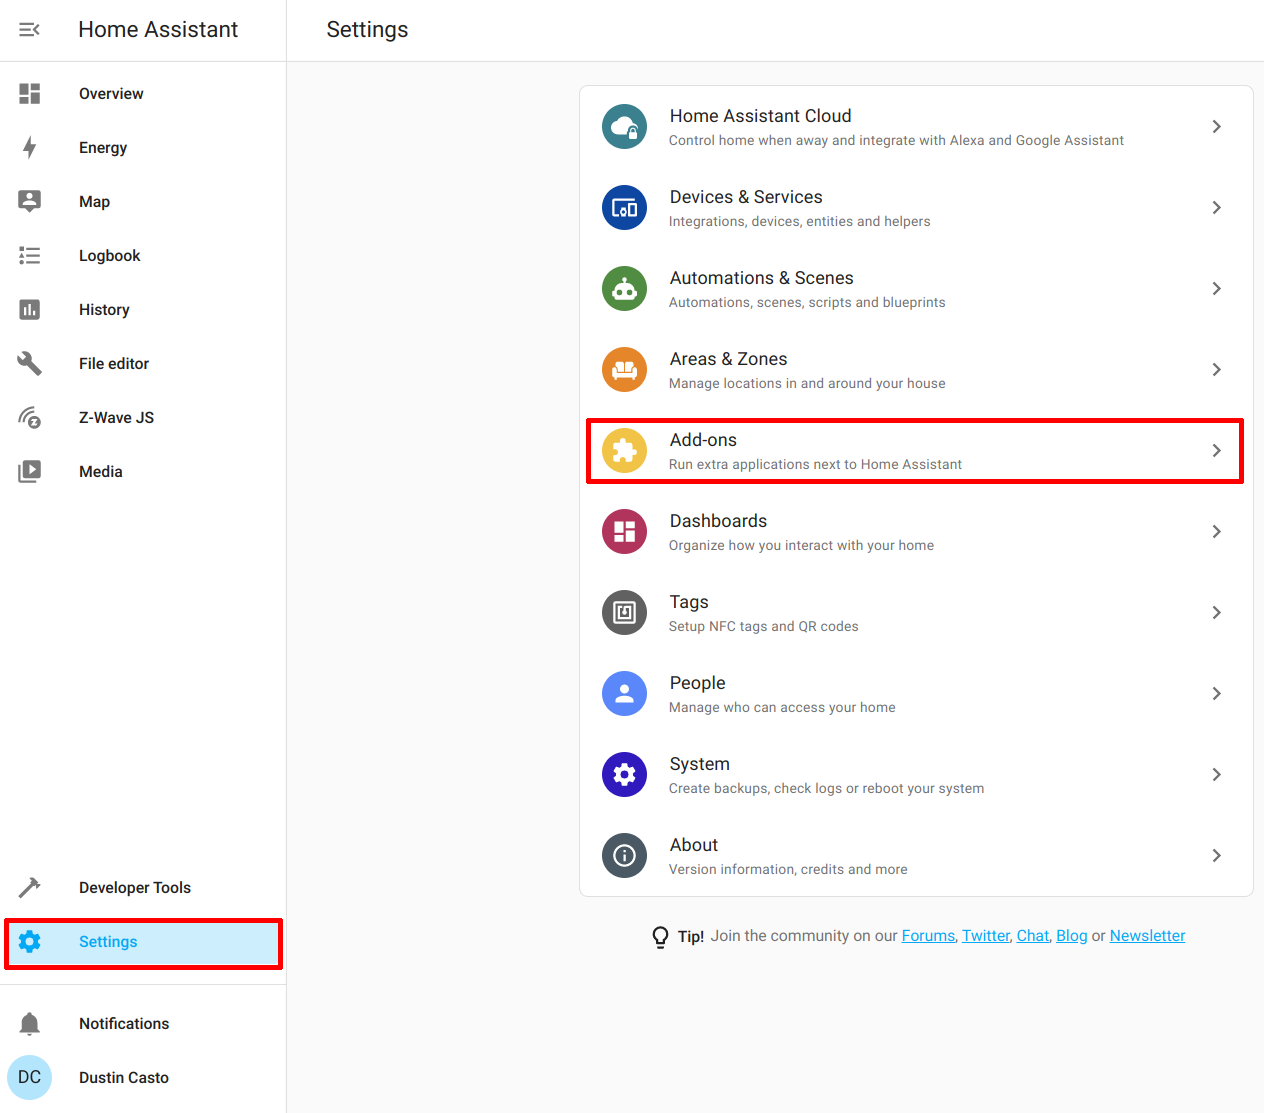
The Nginx Proxy Manager requires a database so you will need to install the MariaDB add-on. Go to the “Settings > Add-ons” page.
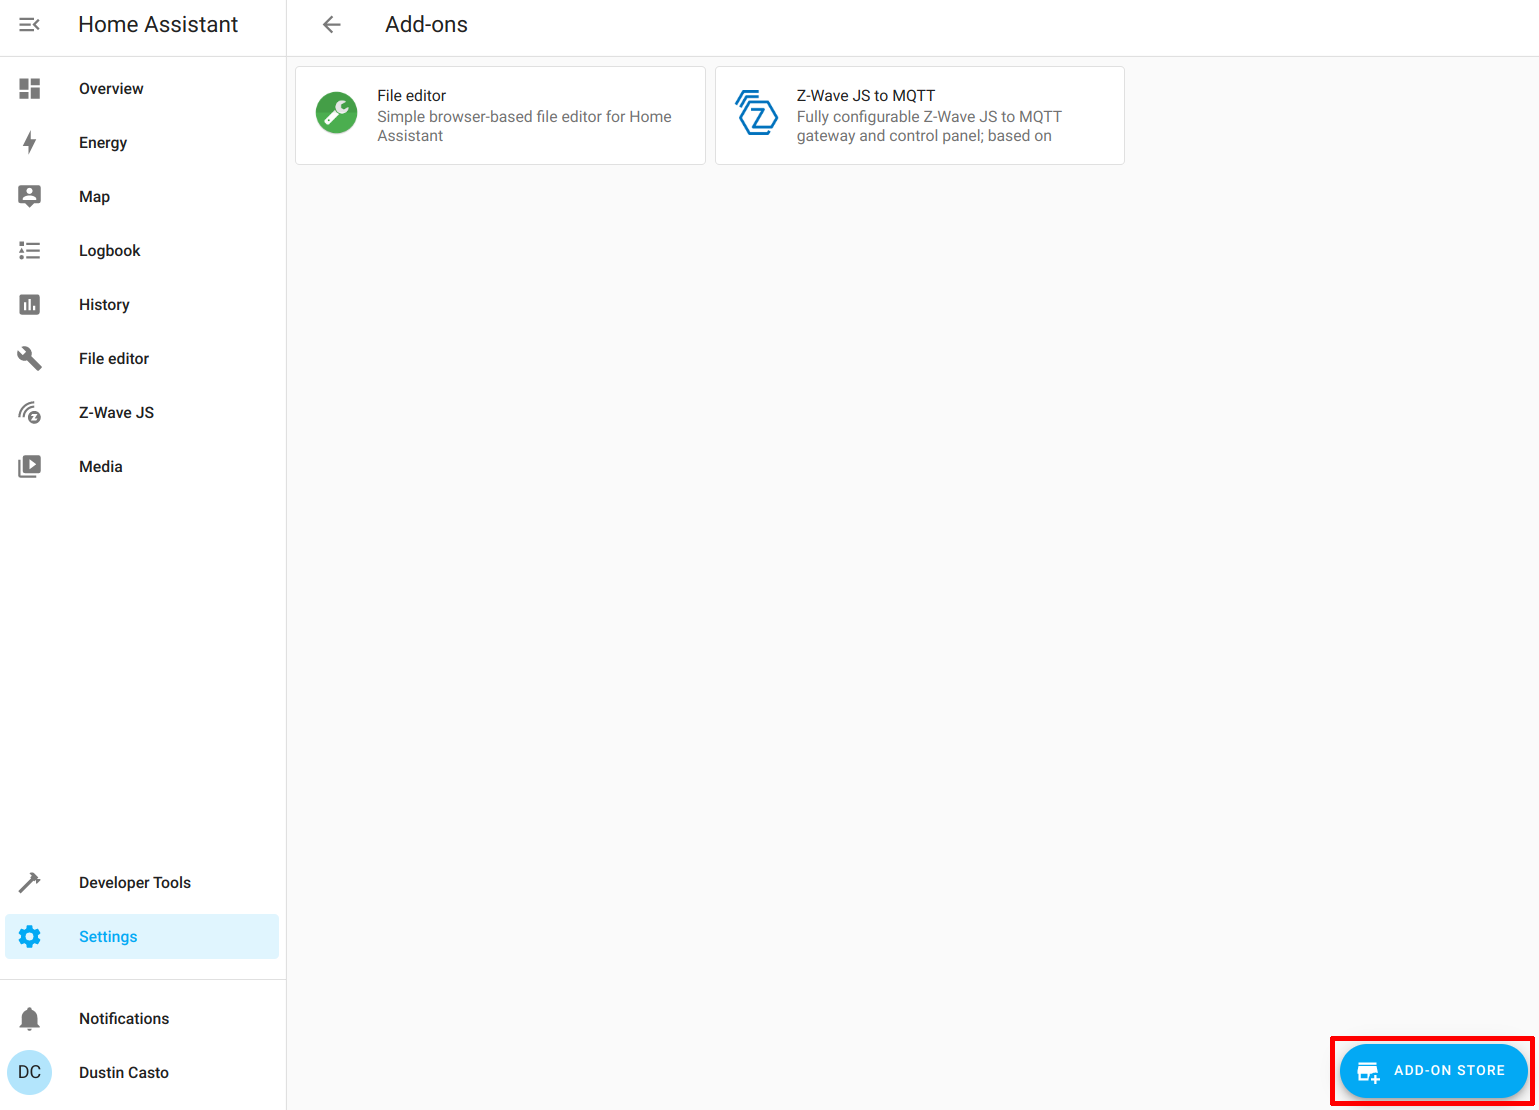
Then click on the “Add-on Store” button in the bottom right of the page.
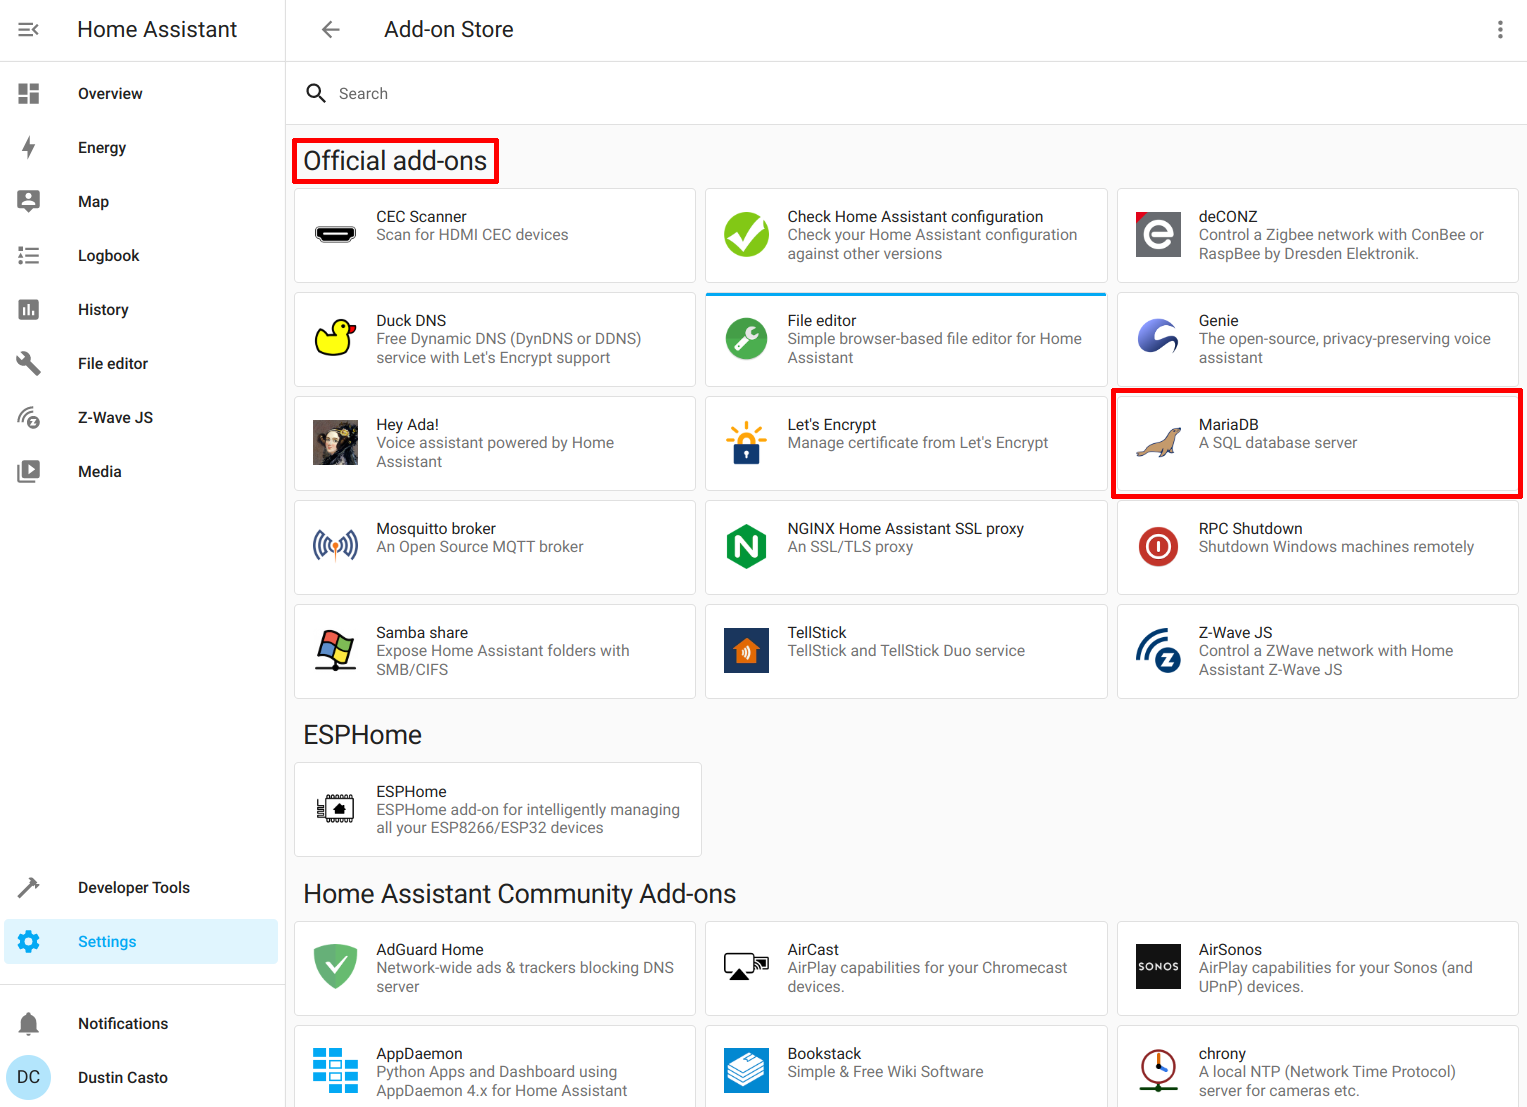
Under the “Official add-ons” section, click on “MariaDB”.
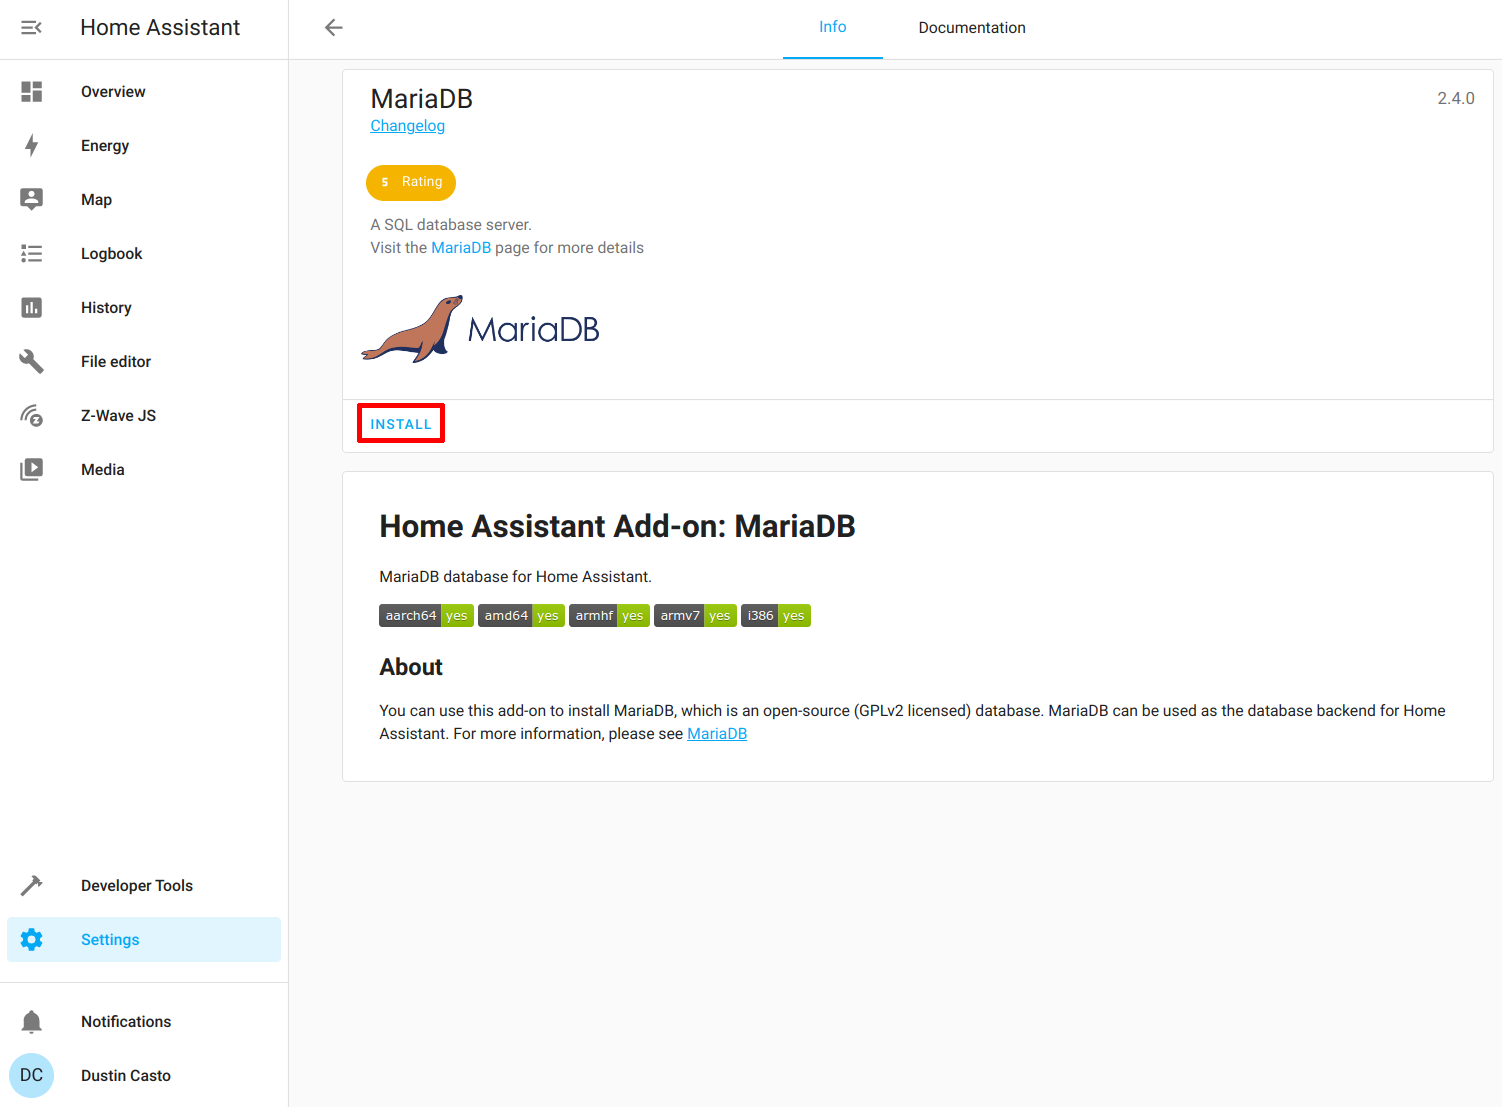
Click “Install” to install MariaDB.
Enable the “Start on boot” and “Watchdog” options and then click on the “Configuration” tab. Do not click “Start” yet.
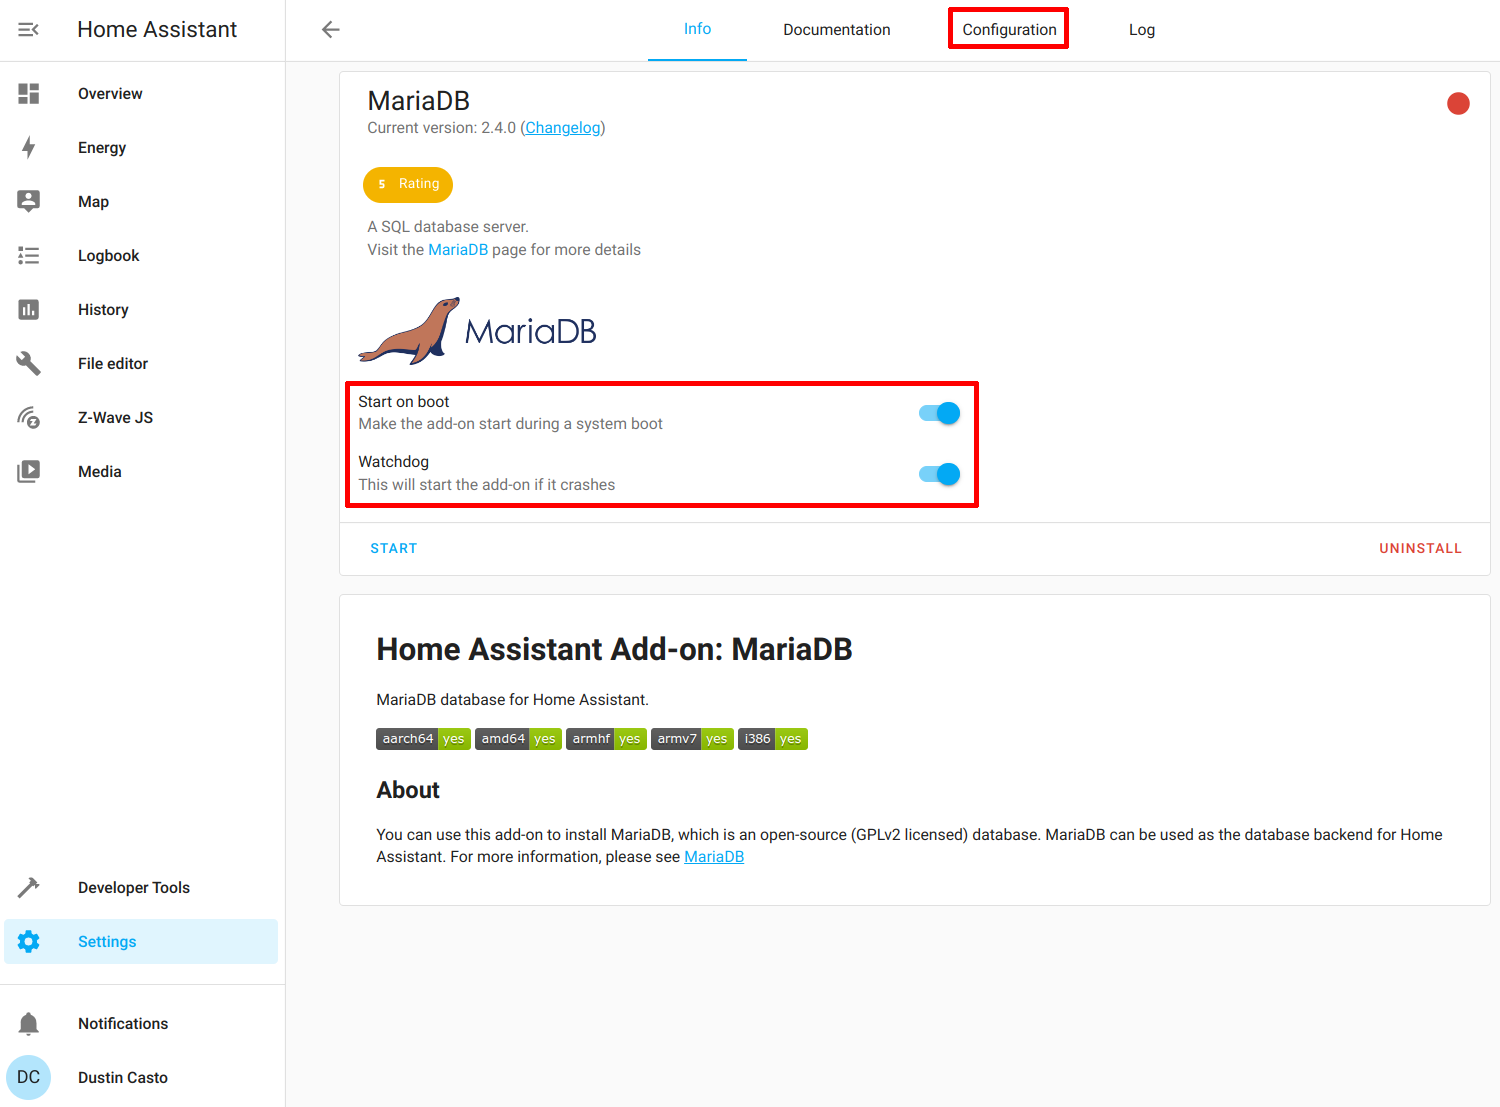
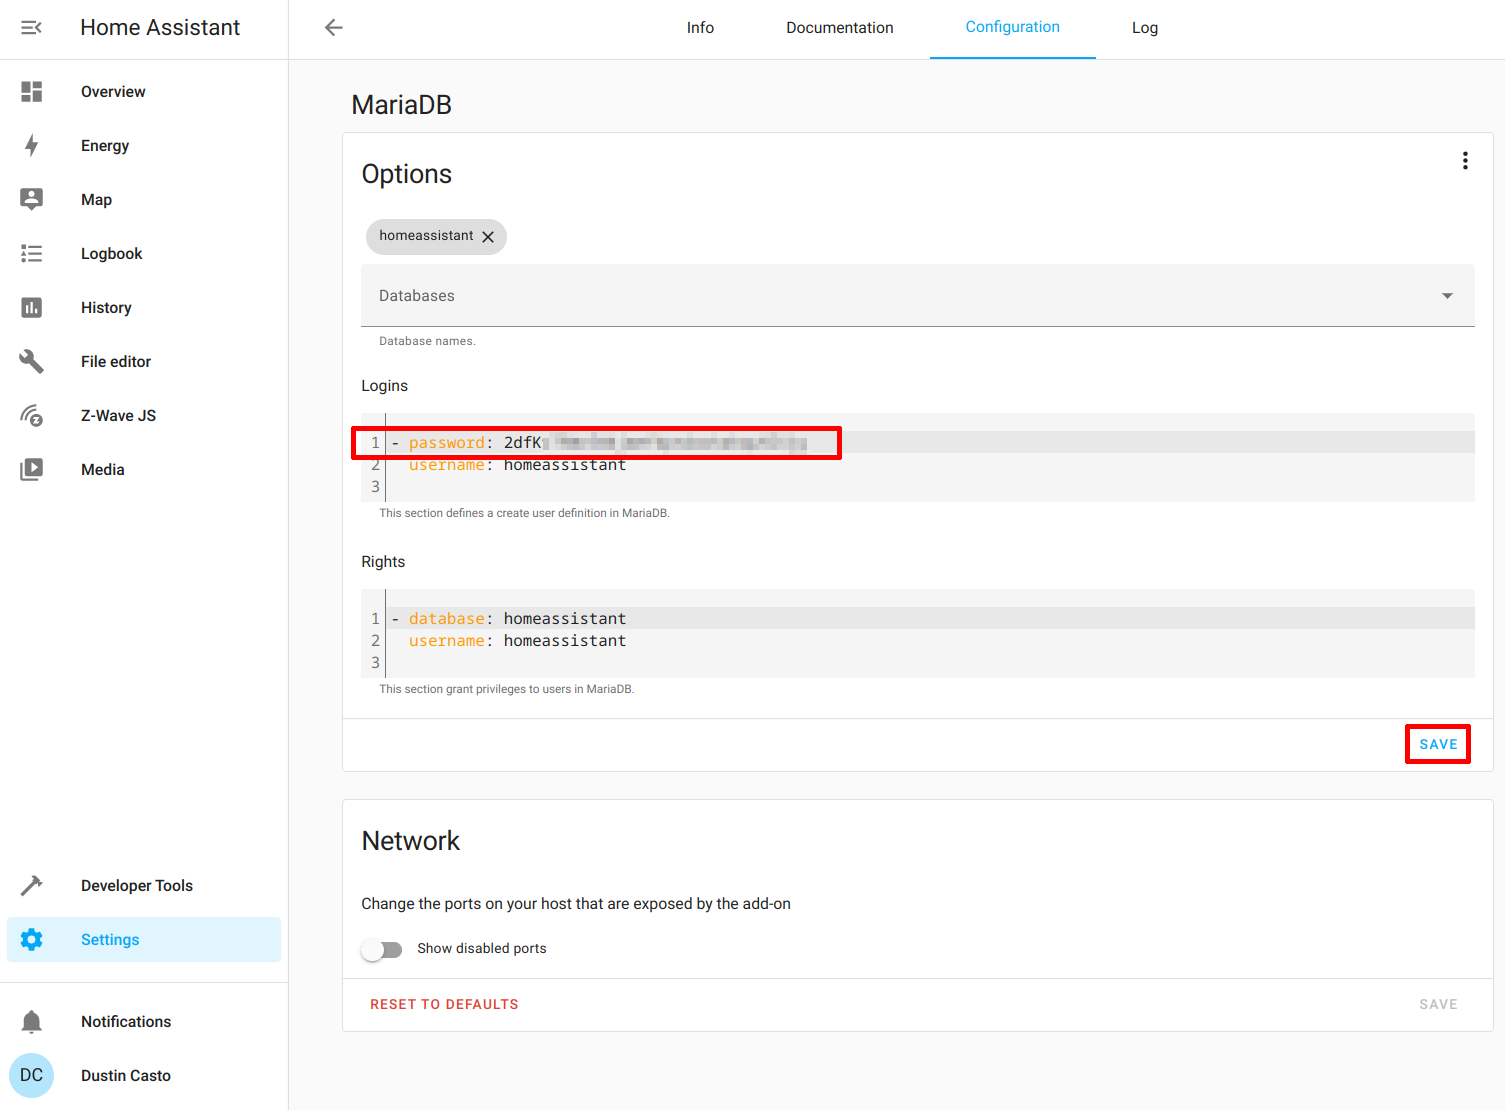
You need to set a password for the database. It is set to “null” by default. The add-on will complain if you do not set the password before starting it. Click “Save” after entering a password.
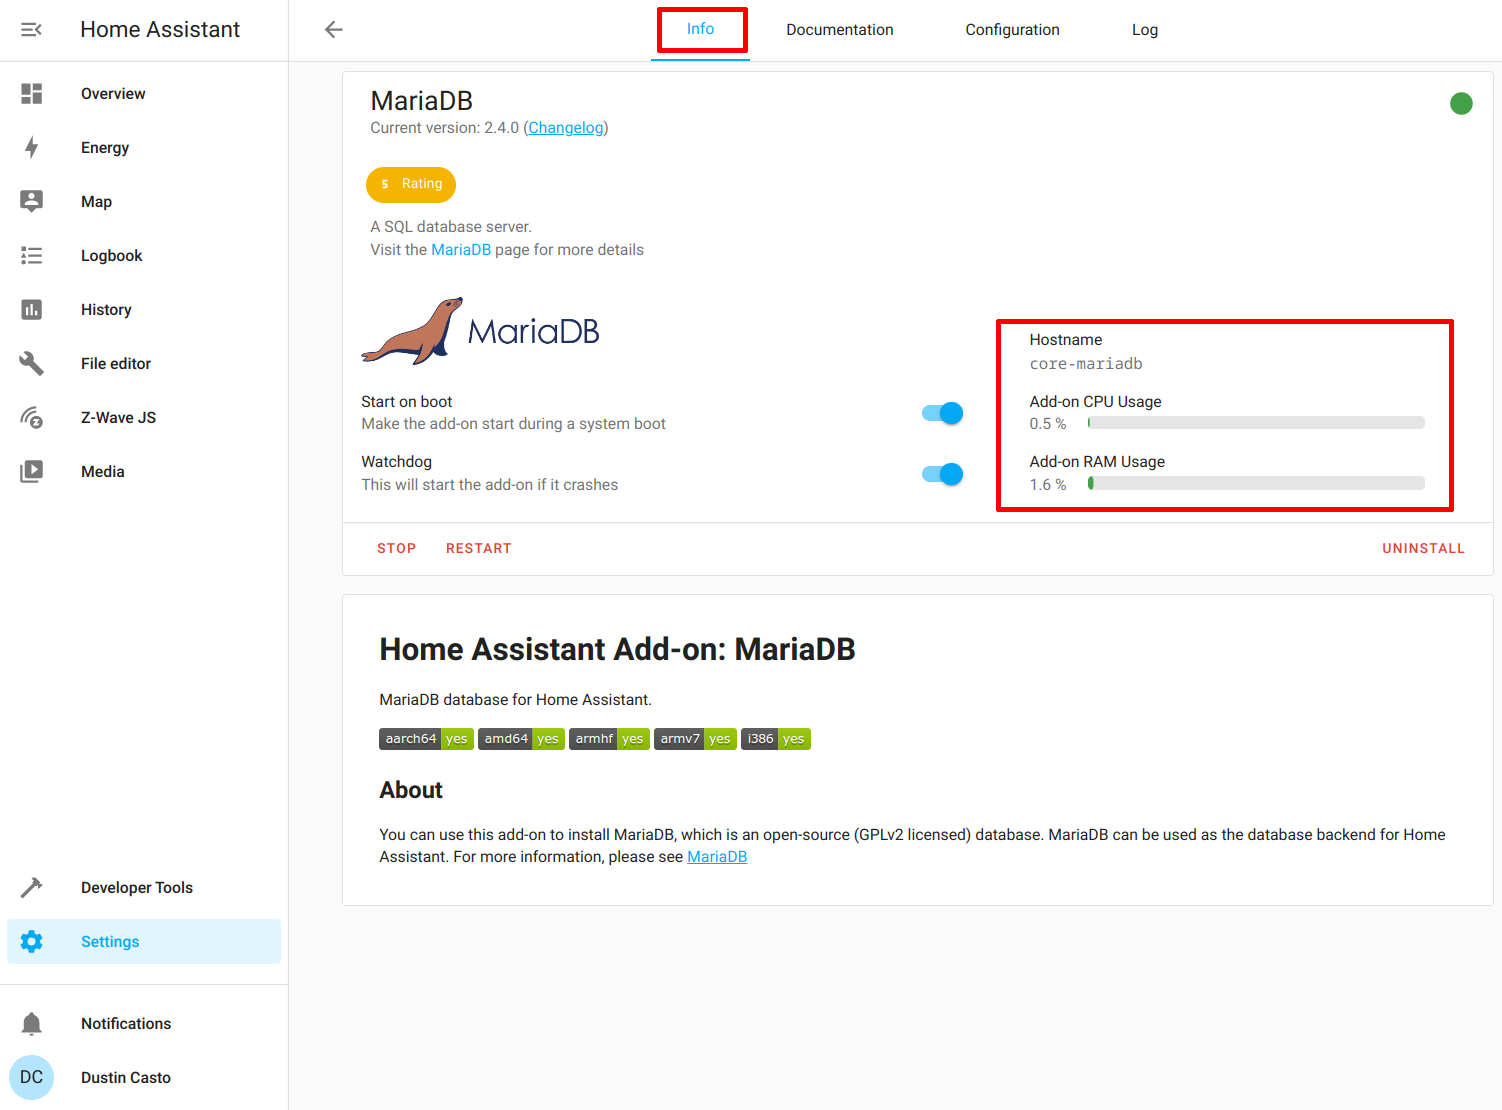
Now you can go back to the “Info” tab and click “Start”. You should see that the add-on is running as shown in the screenshot below.
Install Nginx Proxy Manager
To install Nginx Proxy Manager, you need to go to “Settings > Add-ons”.
Click on the “Add-on Store” button.
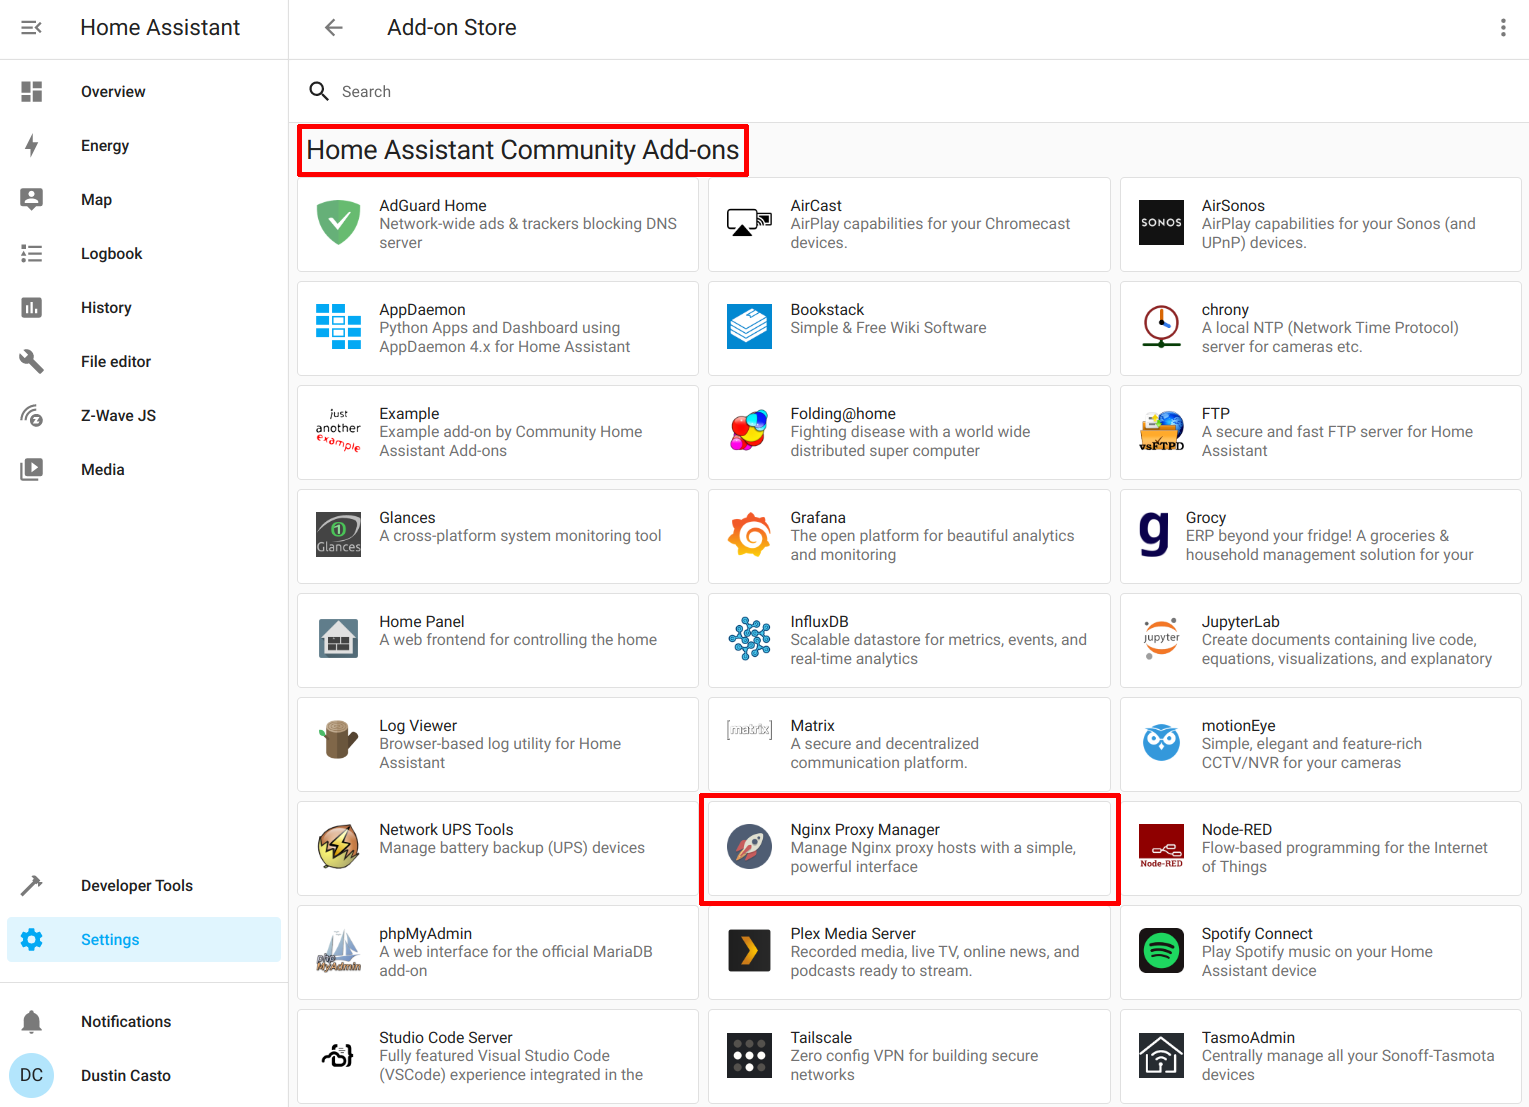
In the “Home Assistant Community Add-ons” section, click on “Nginx Proxy Manager”.
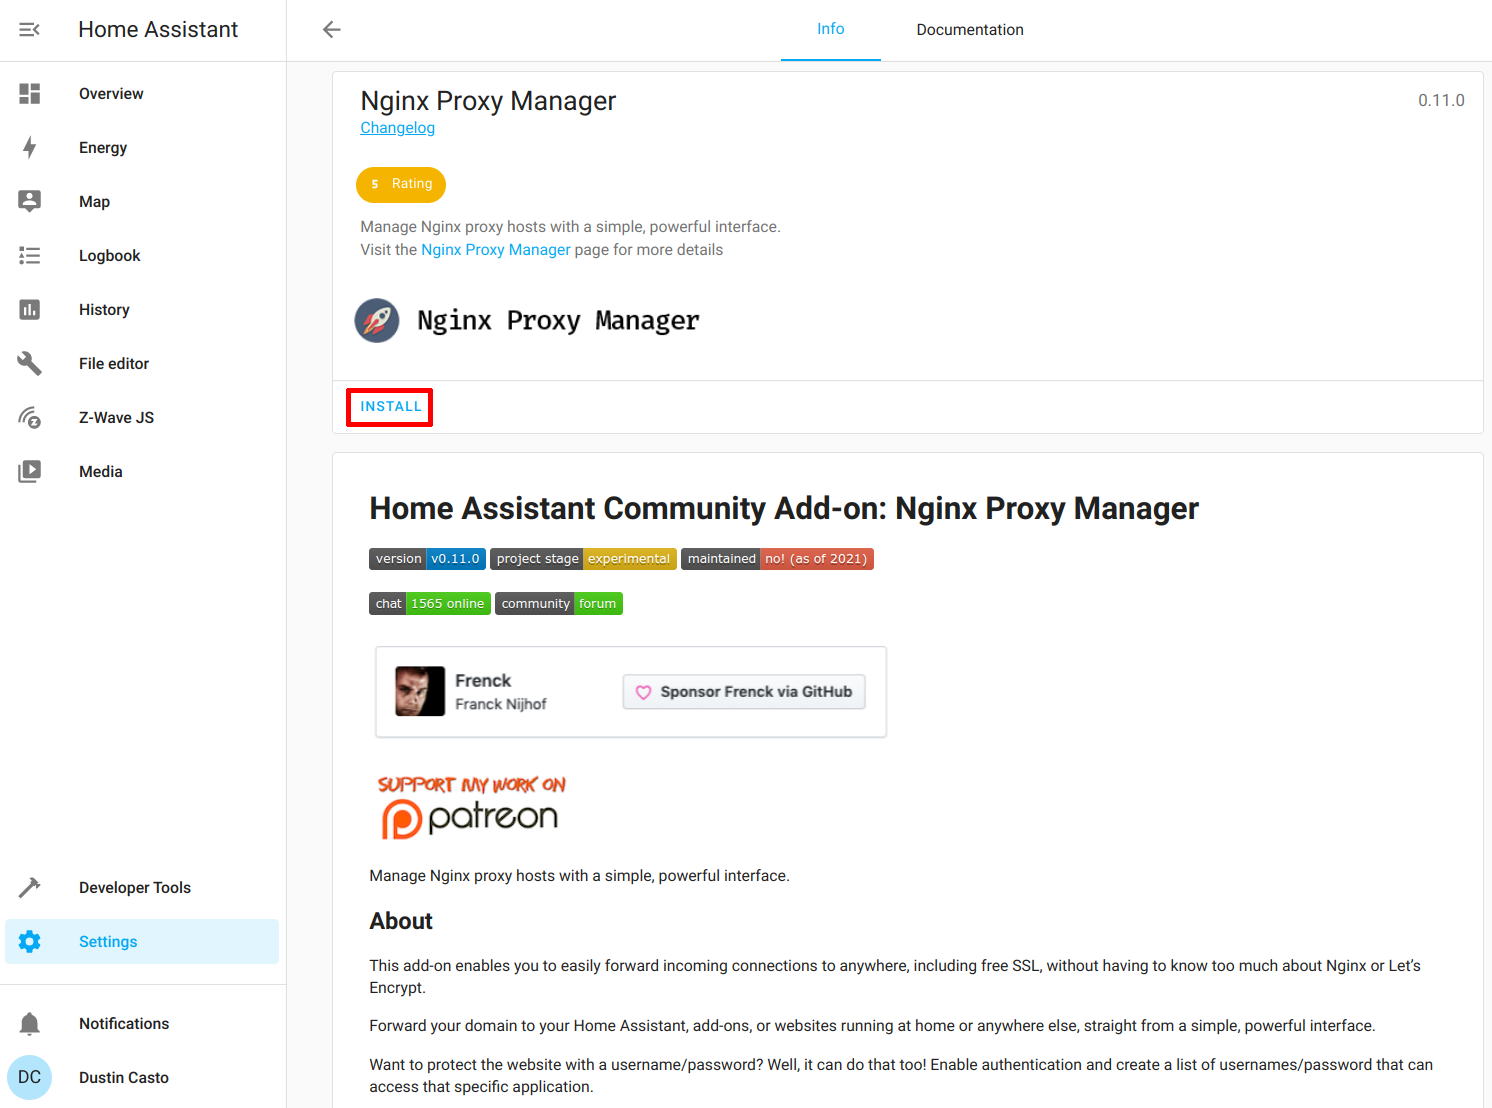
Click “Install” to install NPM.
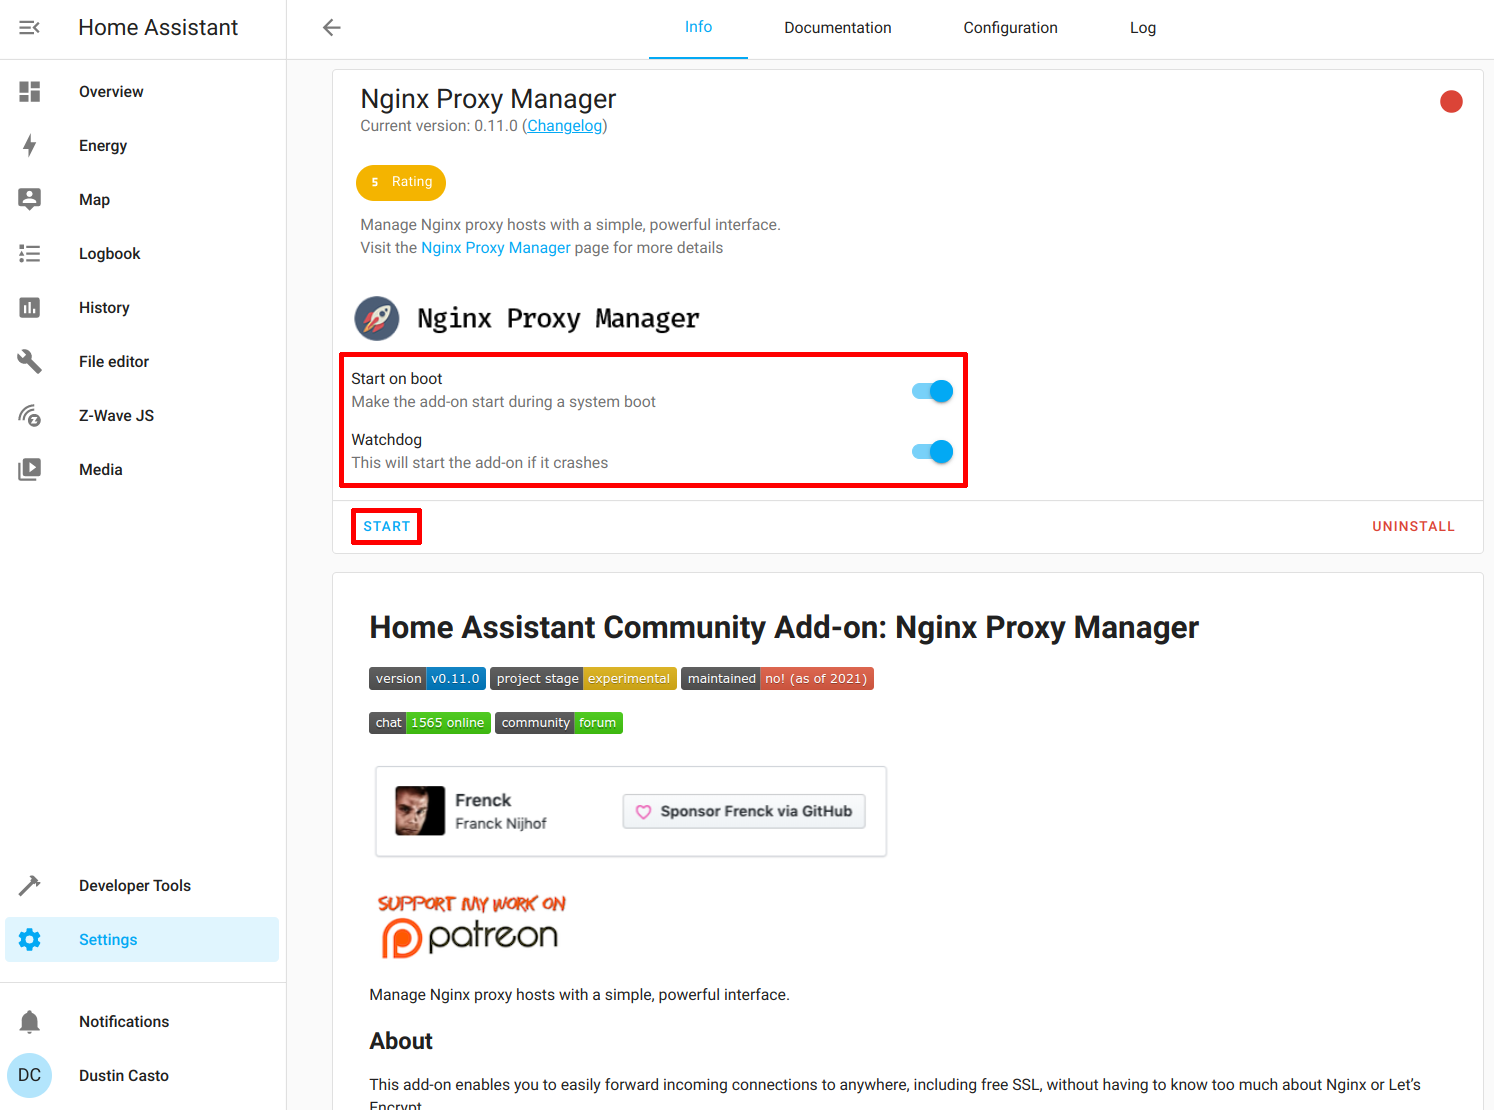
Enable the “Start on boot” and “Watchdog” options and click “Start”.
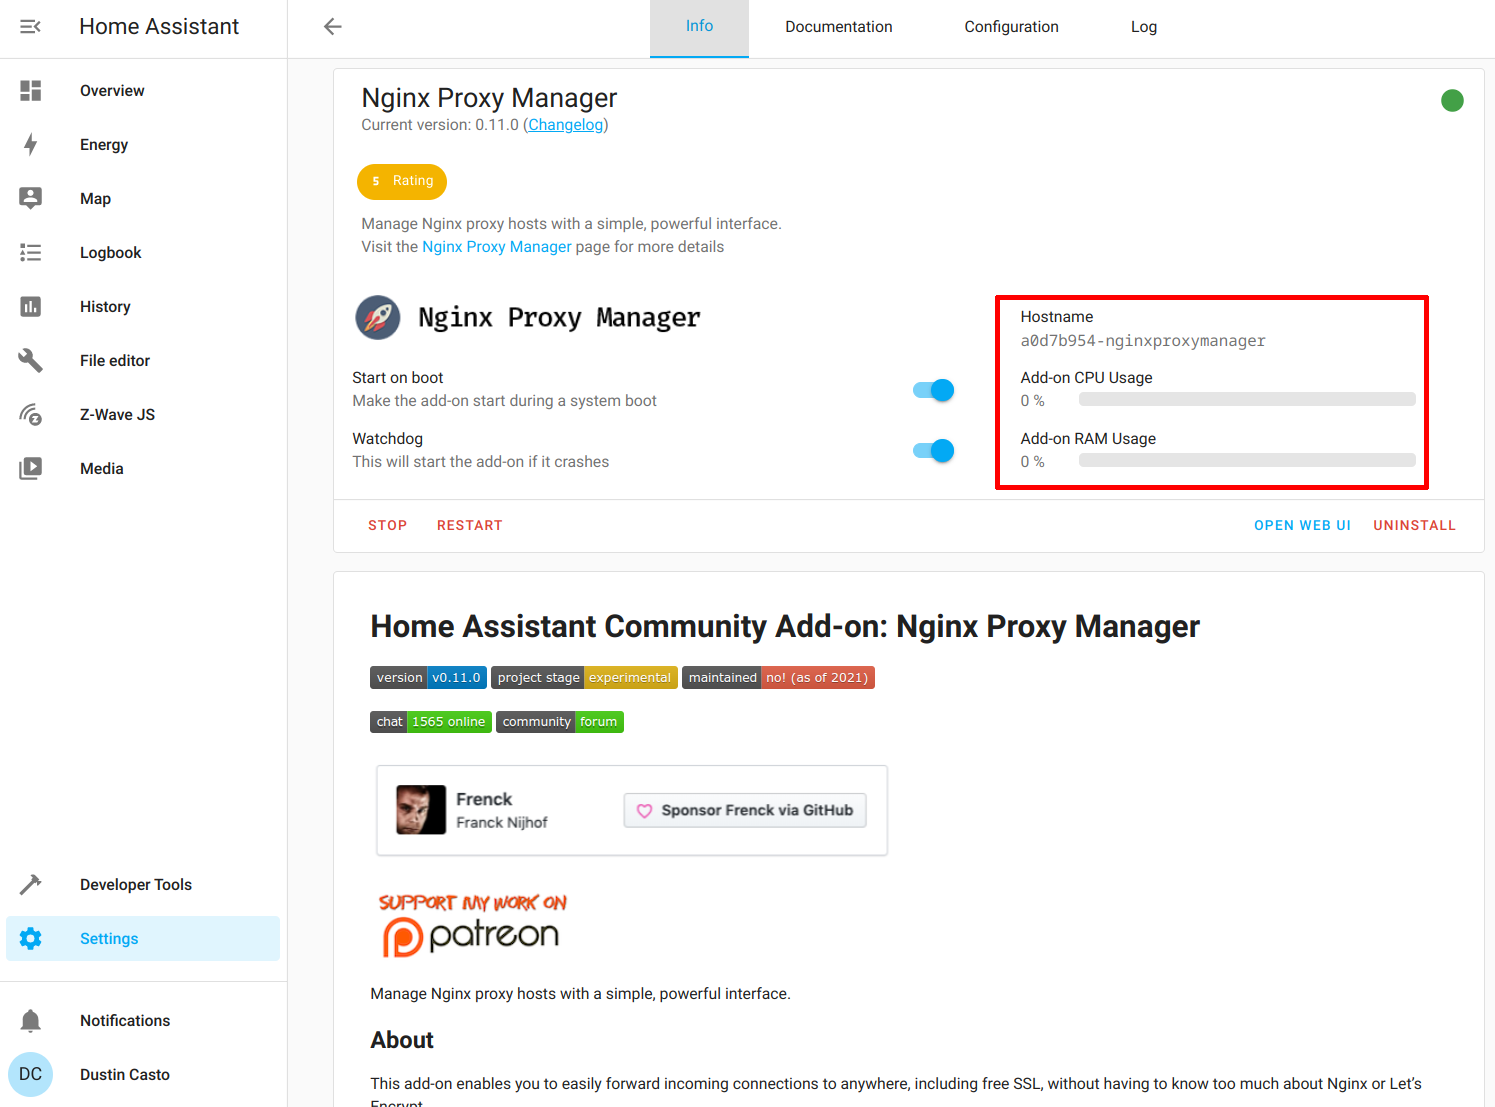
You should see the NPM add-on is running.
Configure Nginx Proxy Manager
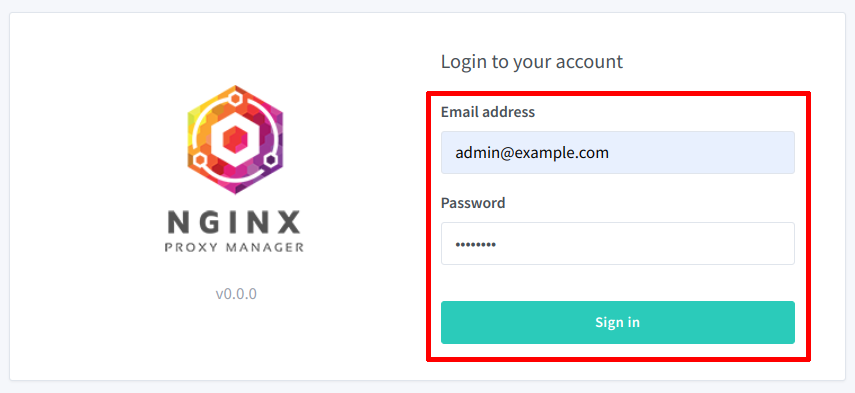
Go to the Nginx Proxy Manager page. It will be the hostname of your Home Assistant on port 81. For example: http://homeassistant:81. You should see the login page. Enter the default credentials [email protected] for the email address and changeme for the password.
You will be prompted to change the user information to your own.

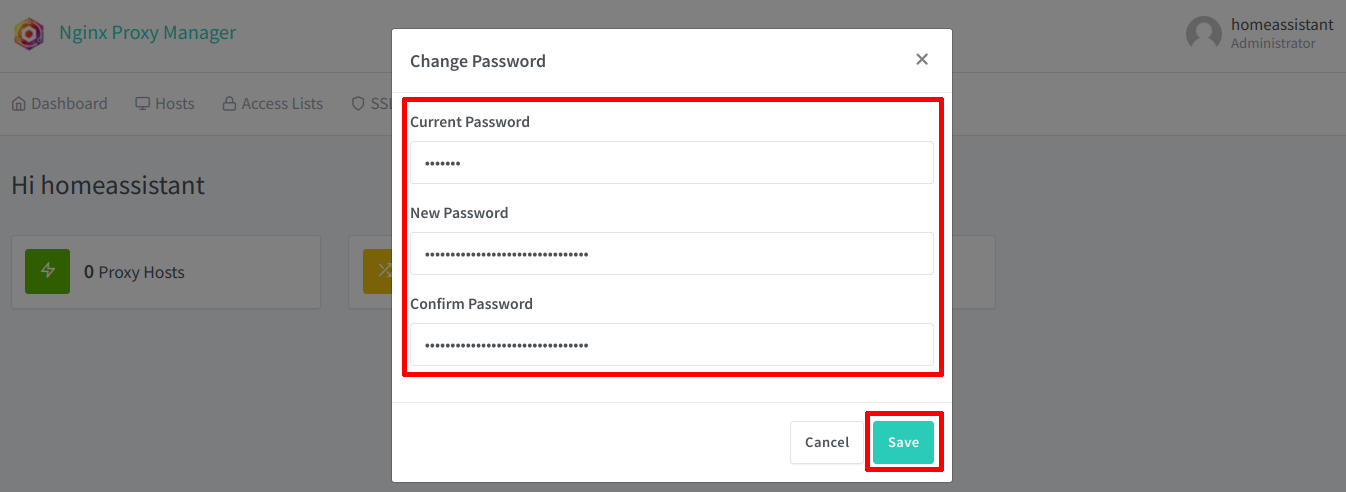
The default password will need to be changed as well.
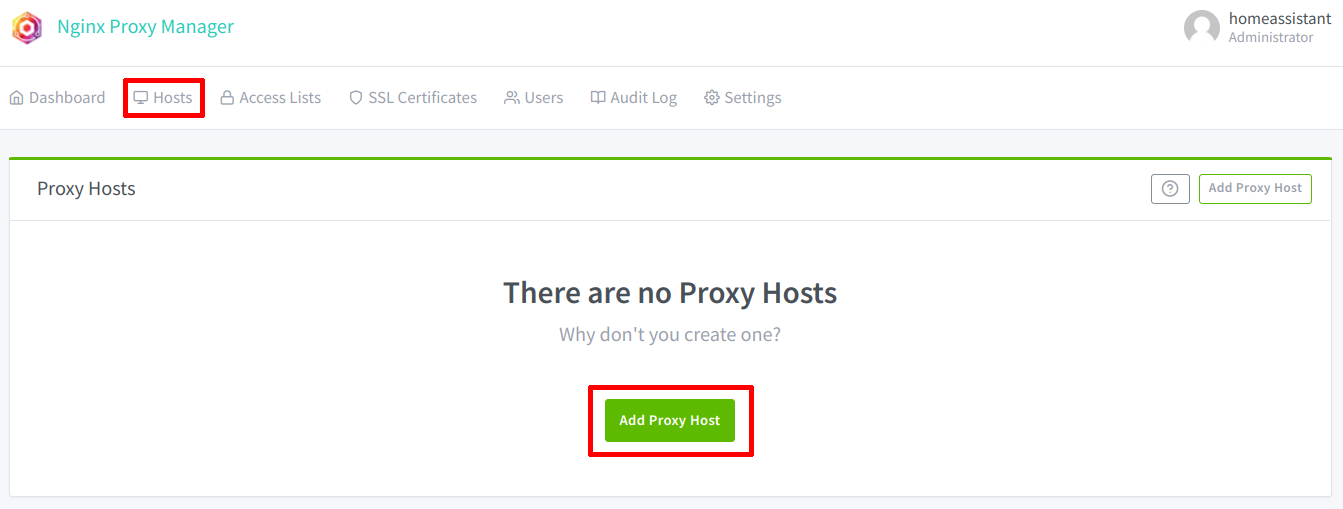
Click on the “Hosts” section so that you can add a proxy host.
Enter your full domain name of your Home Assistant. In my example, I am using hass.theprivatesmarthome.com. This domain name must be a real domain name that you will use to access Home Assistant. It has to be a real domain name because you will be creating a Let’s Encrypt certificate for that domain name. Even if you only want to access your Home Assistant on your local network, you will need to have a registered domain. The domain can either be one you pay for yearly or a free dynamic DNS domain name.
If you only use the domain name internally on your network, you may need to configure a DNS override in your router’s DNS settings in order to prevent using the external IP address of your network. If your router has NAT reflection enabled, it should be able to redirect to your internal server if it recognizes the hostname (the subdomain portion of the fully qualified domain name).

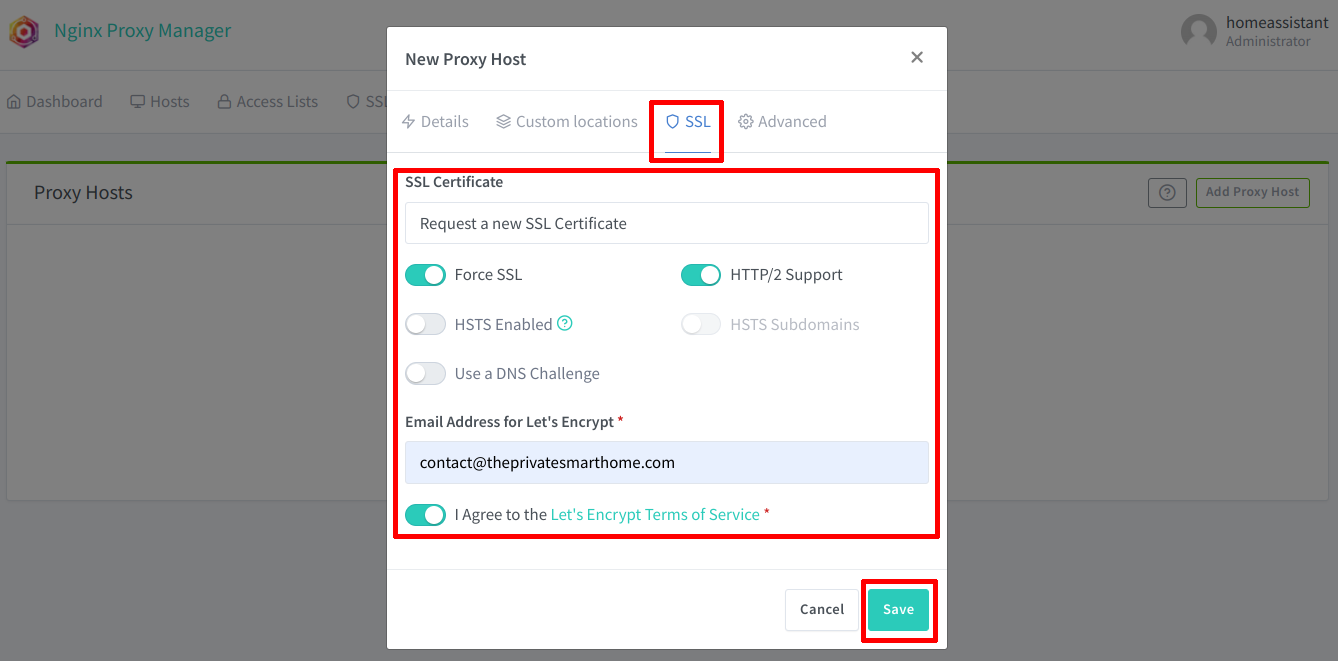
Next, click on the “SSL” tab so you can create a new certificate. Select the “Request a new SSL Certificate” option. If you enable the “Force SSL” option, it will redirect port 80 (HTTP) to 433 (HTTPS). The “HTTP/2 Support” option enables HTTP features to boost performance (probably not noticeable on your local network with minimal web traffic). If you want extra security, you can enable “HSTS” but you may wan to be careful with that options if you have other services exposed since HSTS may apply to your entire domain/subdomains which could interfere with other services on your network. You will need to provide a real email account and click the “I Agree” button before saving.
If you have your Home Assistant exposed to the Internet by port forwarding port 80 and 443, you should be able to click “Save” and have a certificate generated. Your system has to be properly exposed to the Internet in order for the standard certificate generation via HTTP to occur.
However, if you do not want Home Assistant exposed to the Internet and you have a valid domain name registered, you may use the DNS challenge method of obtaining a certificate. I recommend you use this method even if you have your system exposed to the Internet because you can also issue wildcard certificates with a DNS challenge (which is very helpful when hosting multiple services using the same certificate). With a DNS challenge, you have to select the DNS provider since the options can vary based on provider. For Cloudflare, you simply just need to enter an API key which you generated in your Cloudflare account that allows DNS updates. Once you enter the API key, NPM will handle creating the certificates. Keep in mind this is a one time setup so you do not need to do this again unless you are setting up a new Home Assistant installation.
To keep this guide on topic, if you are unsure about how to generate certificates, you will need to learn how Let’s Encrypt issues certificates with challenges before continuing.
Edit Configuration.yaml to Allow Reverse Proxy Connections from NPM
Even though the reverse proxy is configured properly, connections to HTTPS will fail until the configuration.yaml file is updated to allow the reverse proxy. Since Home Assistant and all its add-ons run in Docker, the containers will be using the IP addresses in the 172.16.0.0/12 private IP address range. You can see the current IP that the Nginx Proxy Manager is using in the system logs (“Settings > System > Logs”) if you try to access Home Assistant using HTTPS with the domain name you configured in NPM in the previous step. You should encounter a web browser “Bad Request” error with the status code of 400.
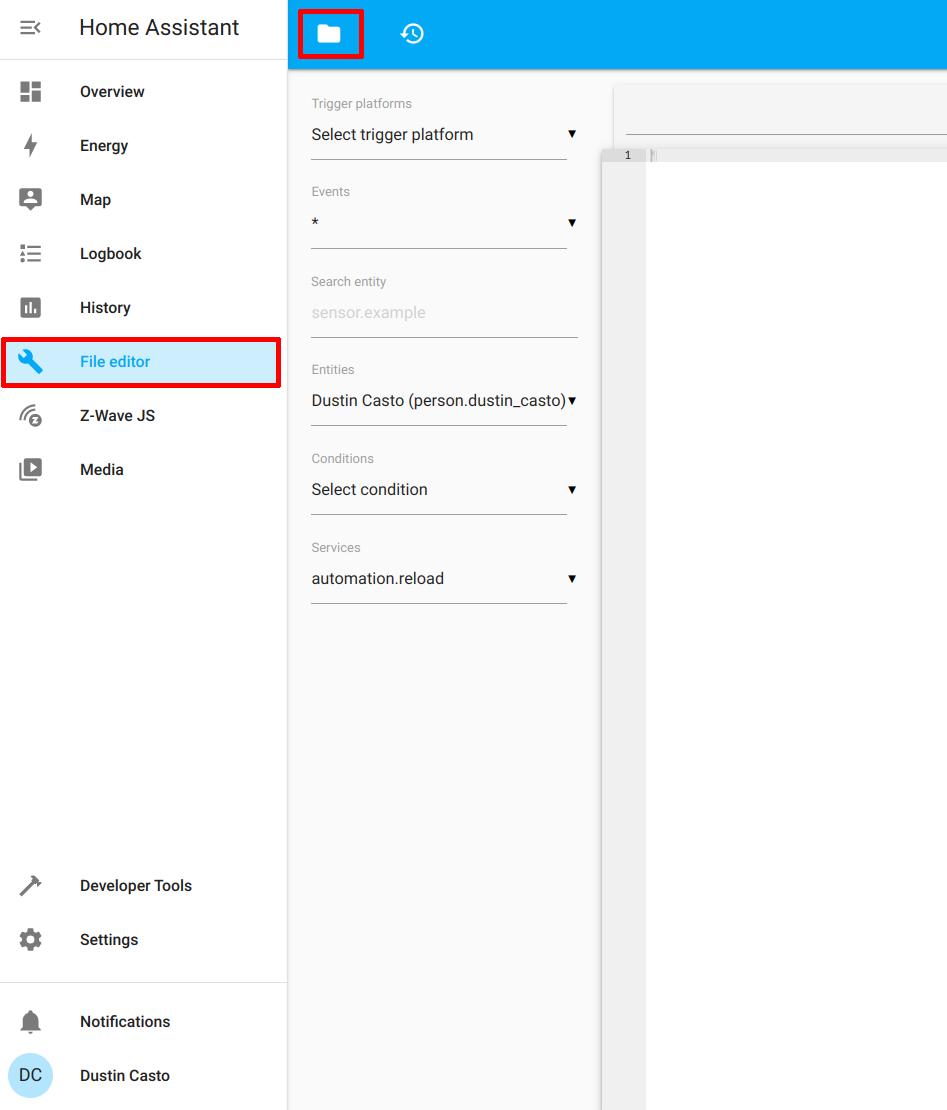
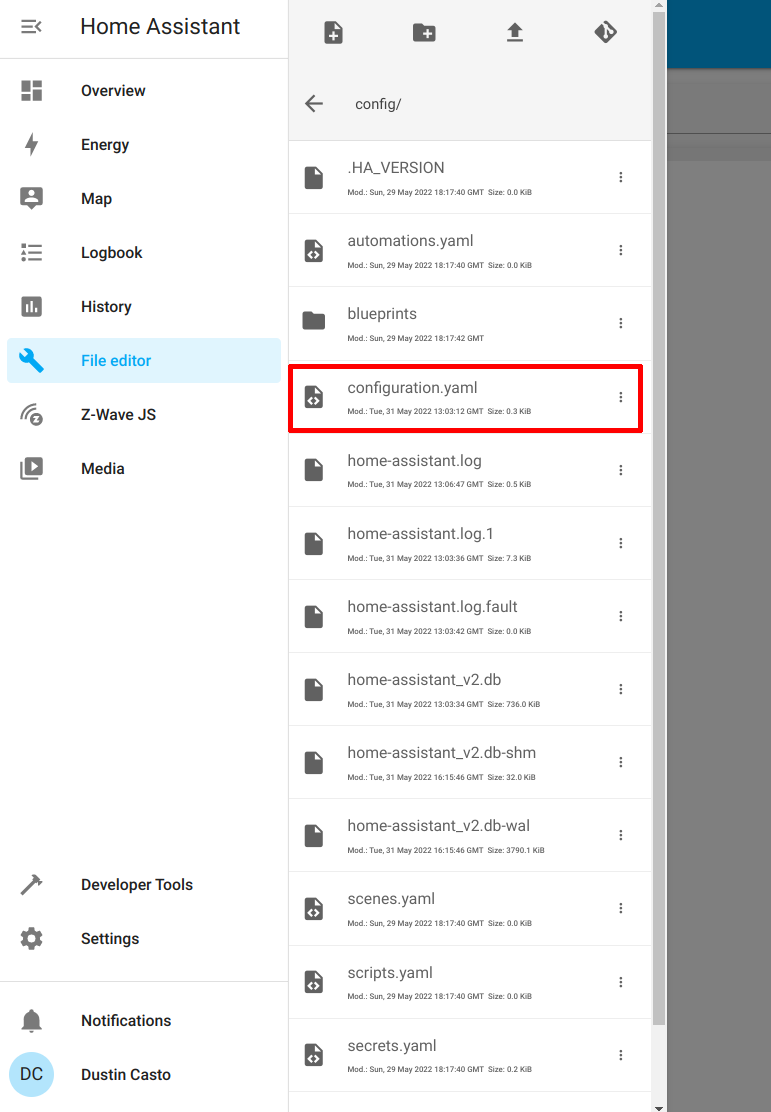
However, since the IP address of the Docker containers can change when you restart the container (and/or upon rebooting Home Assistant), you can simply specify the entire private IP range that Docker uses. I am going to use the “File Editor” add-on to make editing the configuration.yaml file simple. If you do not have that add-on installed, you may install it now before continuing. Click on the folder icon to show the files in the configuration folder.
Click on the configuration.yaml file to select it. Then click in the editor box to the right of the menu in order to begin editing the file.
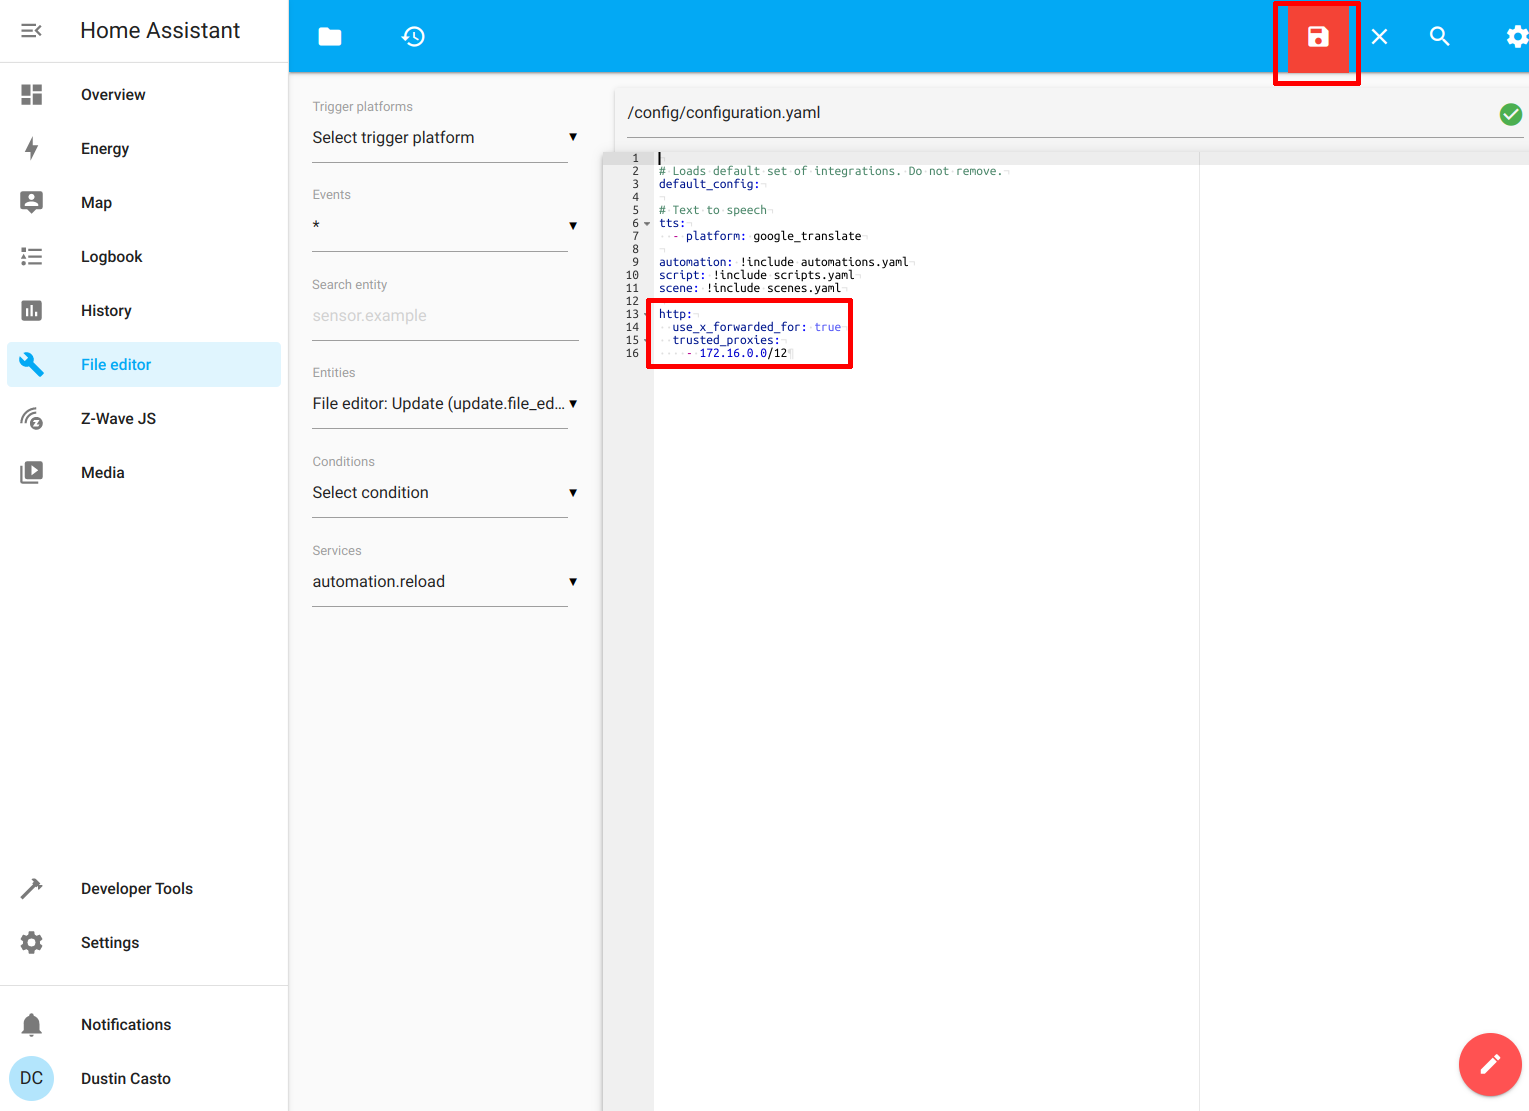
Enter the following configuration at the bottom of the file as shown in the screenshot using the IP address from the log file. In my example, that is 172.16.0.0/12:
http:
  use_x_forwarded_for: true
  trusted_proxies:
    - 172.16.0.0/12
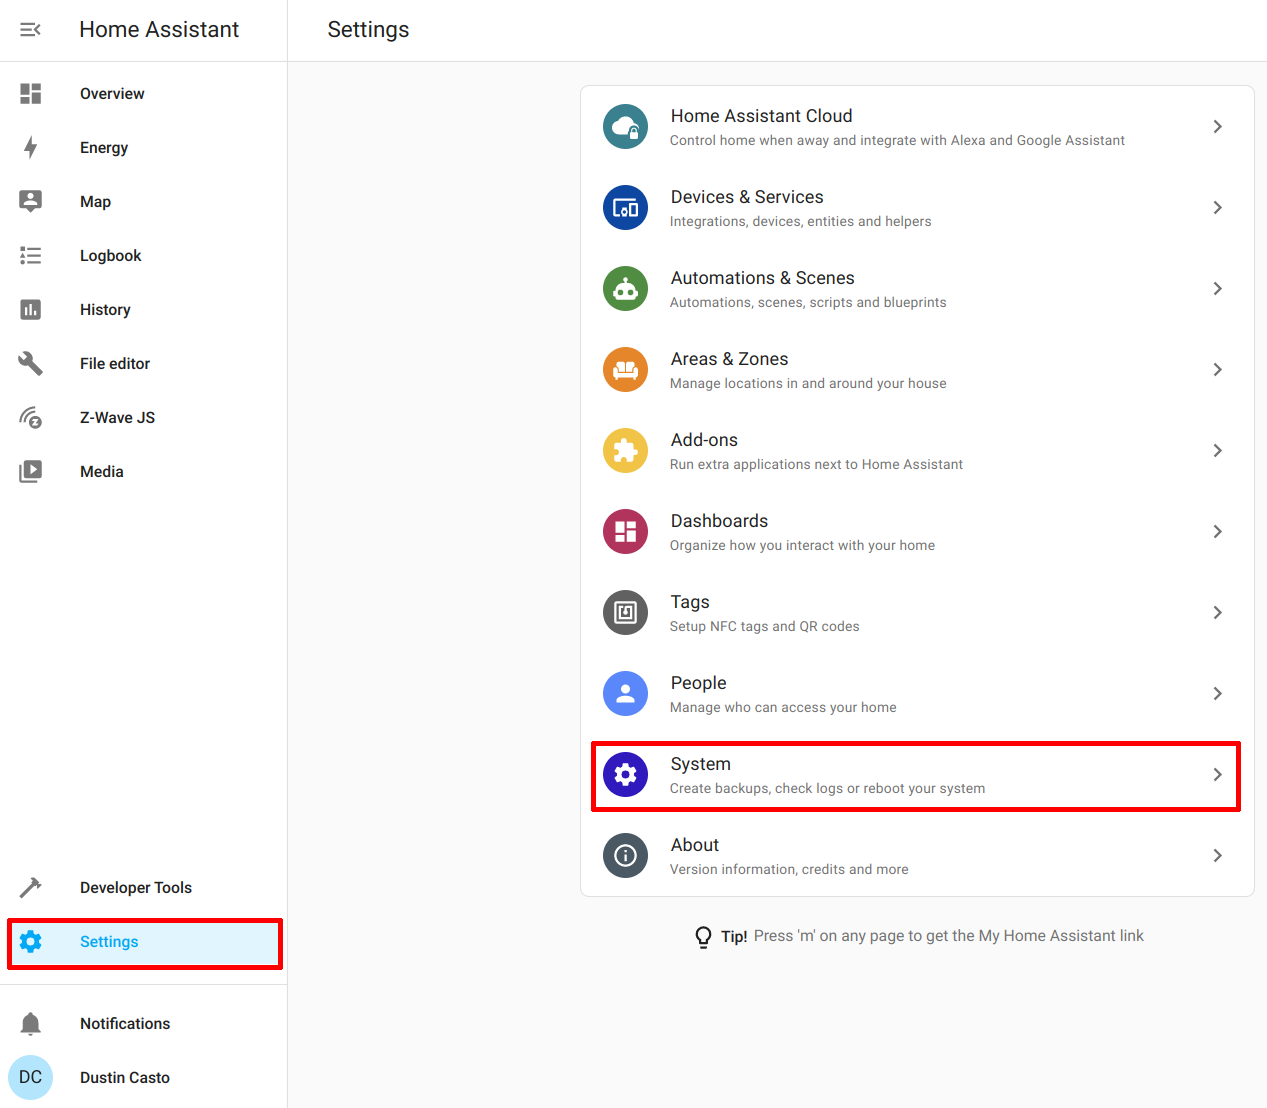
Restart Home Assistant so the changes to configuration.yaml can take effect by going to the “Settings > System” page.
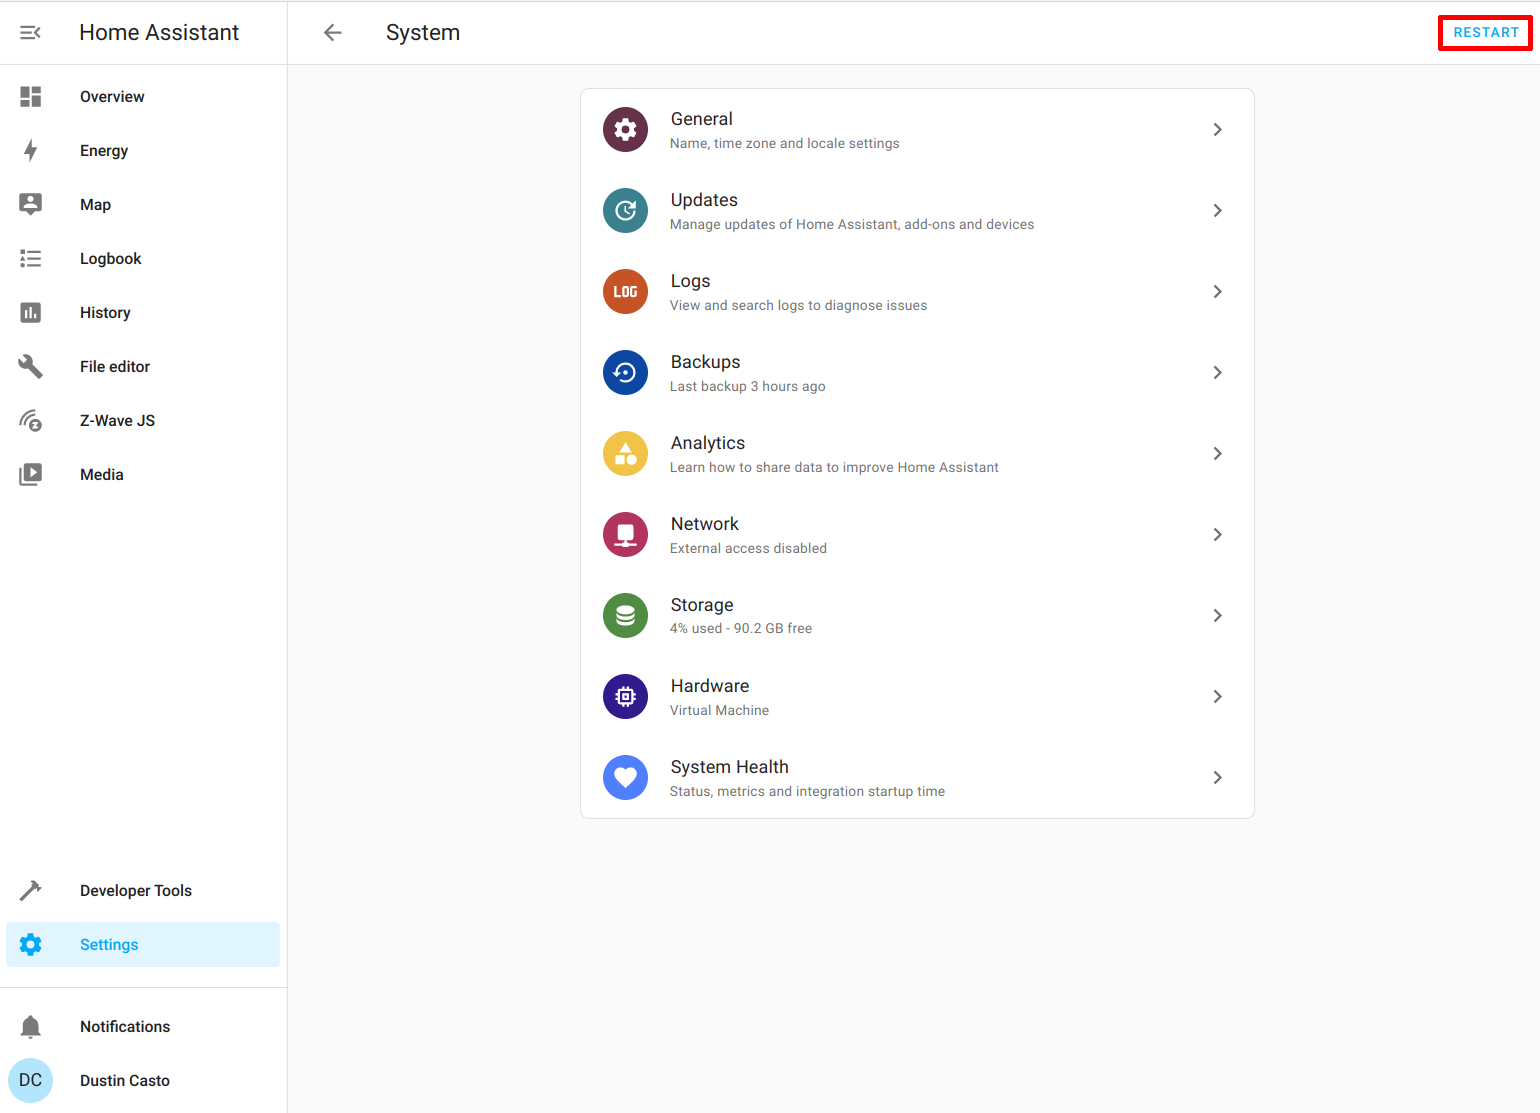
Click on “Restart” in the upper right hand corner of the page to restart Home Assistant.
Access the Secured Home Assistant Page
If everything has been configured successfully, all that is left to do is visit the domain name you configured in your proxy such as https://hass.theprivatesmarthome.com to access Home Assistant securely! You will have to sign in again even if you were signed into the unsecure HTTP web interface.
I hope this guide has been helpful. The most difficult part about this process is setting up the domain name and certificate if you are unfamiliar with how to do those things. Since there is a number of DNS providers and different challenge types for certificate generation, that part of the process may be less straightforward. However, if you are familiar with those topics, you should have an easier time with those steps.
Related Posts

How to Put Home Assistant behind Existing Nginx Proxy Manager
A reverse proxy allows you to conveniently have a single entry point by which you may host multiple apps/services on one or more systems.
Read more
Add the Community Add-on Repository in Home Assistant if it is not Installed
When I was updating the Home Assistant Core, I encountered an interesting issue. It broke my Z-Wave JS to MQTT add-on.
Read more
Create a Basic Automation in Home Assistant
When you have Home Assistant running with at least one smart device configured, you are ready to start creating automations! Automating tasks in your home is one reason to create a smart home.
Read more