
How to Install Home Assistant on Proxmox
Home Assistant is a home automation software that is often installed on single board computers (SBCs) such as the Raspberry Pi because the system resources required by Home Assistant are low enough that a SBC will be sufficient for many users. However, if you already have a home server that is always on, you have the option to run Home Assistant on much more powerful hardware. One of the greatest benefits is increased responsiveness since Home Assistant is running on faster hardware.
If you run a hypervisor such as Proxmox, you gain other benefits such as simple backups and restores as well as better utilization of hardware resources since you can allocate the exact amount of resources required to run Home Assistant efficiently. In this guide, I will demonstrate how to install Home Assistant on Proxmox in a virtual machine. I am going to assume you already have Proxmox installed and are ready to install Home Assistant.
Install Home Assistant
When I searched for guides online on how to install Home Assistant in Proxmox, I found several which used scripts that others have written to make the process simple (unless the script no longer works). After running the script, you have to tweak the hardware resources for the VM afterwards to set more appropriate values.
One guide showed how to create a VM in the Proxmox web interface, downloading the Home Assistant disk image on a separate PC, transferring the disk image to Proxmox with FileZilla, using the command line to import the virtual disk image, and finally using the web interface to finish attaching the disk.
What if you could just do it all within Proxmox with a few commands? I think this approach is straightforward and requires fewer steps than other installation methods since you will not need to jump back and forth between the UI and the shell to get Home Assistant up and running.
Log into your Proxmox host as the root user before running the commands. You may log directly into the Proxmox system or use the user interface to open the shell on the Proxmox host.
Create the Virtual Machine
You may specify the VM ID, name, number of cores, amount of memory, and the network bridge you wish to use in the following command. You will need to change the value of 100 for the VM ID if you already have a VM or container with the same ID. The network bridge will mostly like need changed since yours may be different than vbmr3 that I am using in my example. It is important to note that you need to include the boot order option so when you import the Home Assistant disk image it will boot from the proper device. Otherwise, it will try to boot from your network interface by default.
qm create 100 --name home-assistant --bios ovmf --boot order=virtio0 --machine q35 --cores 4 --memory 4096 --scsihw virtio-scsi-pci --net0 model=virtio,bridge=vmbr3 --agent enabled=1 --tablet 0
Since the Home Assistant virtual machine is using UEFI, you will need to create the EFI disk and assign it to the VM. In the following command, be sure to use the same VM ID and enter the storage pool where you want the disk to reside. If you are using ZFS as your root Proxmox file system, you will likely use local-zfs. If you are using ext4 with lvm, you will likely use local-lvm. This is the same location where you are running your other VMs/containers, so you will need to enter the appropriate location.
qm set 100 --efidisk0 local-zfs:1,format=raw
Download the Home Assistant Disk Image
Now that the VM has been created, you need to download the Home Assistant disk image. To find the latest version of Home Assistant, go to their Linux Downloads page. Copy the URL for the KVM (.qcow2) image since that is the format used by Proxmox for VMs. At the time of this writing, it is Home Assistant OS v6.6. You may use the wget command to download the compressed disk image.
wget https://github.com/home-assistant/operating-system/releases/download/8.1/haos_ova-8.1.qcow2.xz
The use the unxz command to extract the file.
unxz haos_ova-8.1.qcow2.xz
Import the Home Assistant Disk Image
After extracting the disk image, you need to import the image into the virtual machine using the name of the Home Assisant disk image file you downloaded and extracted. Be sure to use the appropriate storage pool of local-zfs or local-lvm like you did with the EFI disk.
qm importdisk 100 haos_ova-8.1.qcow2 local-zfs
When the import is complete, you need to set/attach the disk image to the virtual machine. The output from the qm importdisk command above will display the name of the imported disk. You will need to use that same name in the qm set command. Most likely, it will be in the format of vm-100-disk-1 where 100 is the VM ID.
qm set 100 --virtio0 local-zfs:vm-100-disk-1
With 6 commands, you should have a fully working virtual machine with Home Assistant installed!
Remove the Downloaded Home Assistant Disk Image File
When the Home Assistant image is imported using the qm importdisk command, it copies the disk image to the Proxmox virtual machine folder on the local-zfs (or local-lvm) storage pool. Therefore you no longer need the disk image file you downloaded, and it may be deleted to clean up your file system (if you are using a smaller SSD/NVMe, you likely do not want to waste precious disk space).
rm haos_ova-8.1.qcow2
Log into Home Assistant
If you are on the same network as Home Assistant, you may be able to log in using the address: http://homeassistant.local:8123. You may also open the console for the virtual machine in Proxmox to see the IPv4 and IPv6 addresses which you may use to access Home Assistant. If you put Home Assistant on another network, you will need to open the appropriate firewall rules.
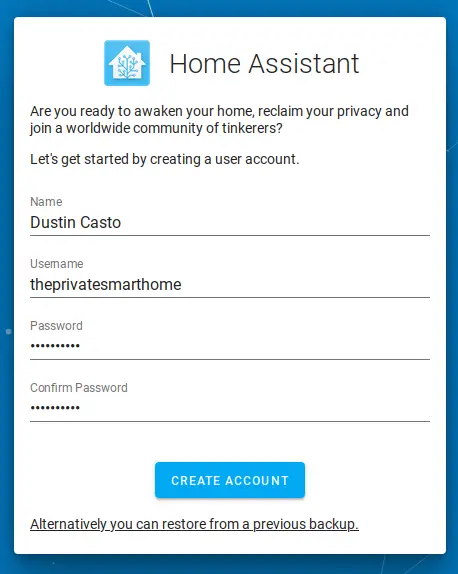
The first page will prompt you to create your administrator user account.
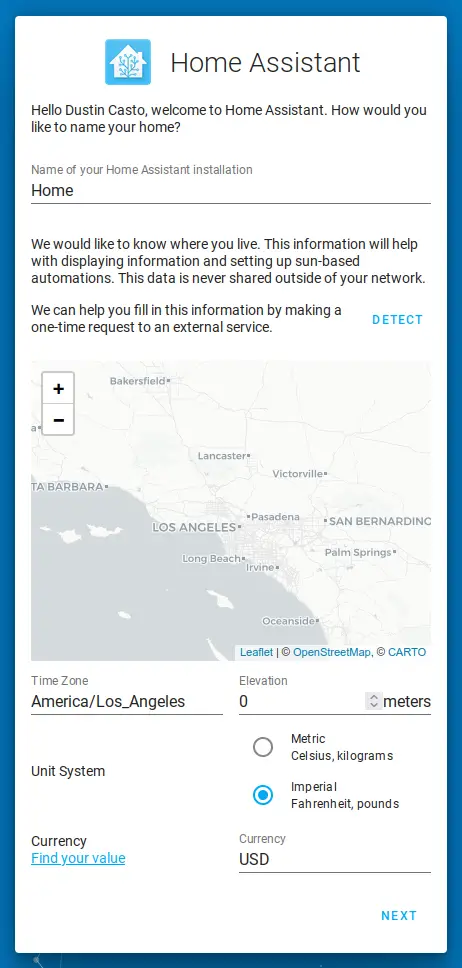
You can set a location for your home, which is used for sunset/sunrise information and could be used for geofencing as well. It is stated that your home information is not shared outside of your network if you are worried about privacy concerns. You may also set your desired units and currency for entities that use it within Home Assistant.
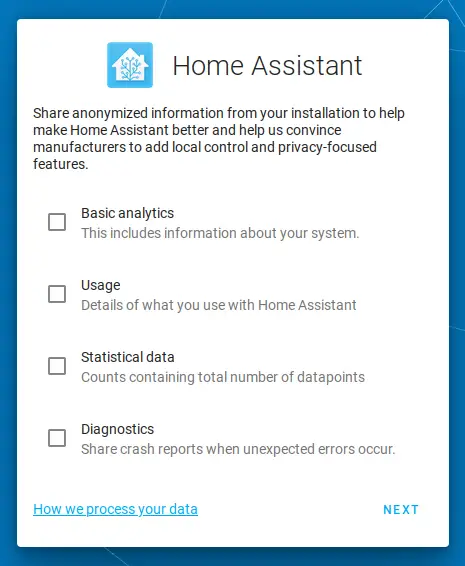
The collection of various statistics may be enabled if you wish to send anonymous statistics to help the developers improve the Home Assistant experience.
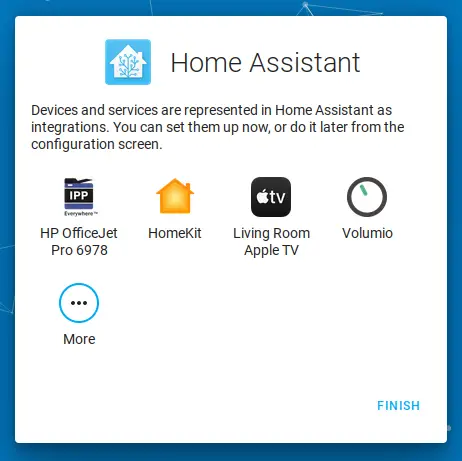
Home Assistant will scan for compatible devices on your network to help you get started with some integrations. As you can see in the screenshot, it will find printers, Apple TVs, and media players such as Volumio. There may be other devices/services that are found on your network.
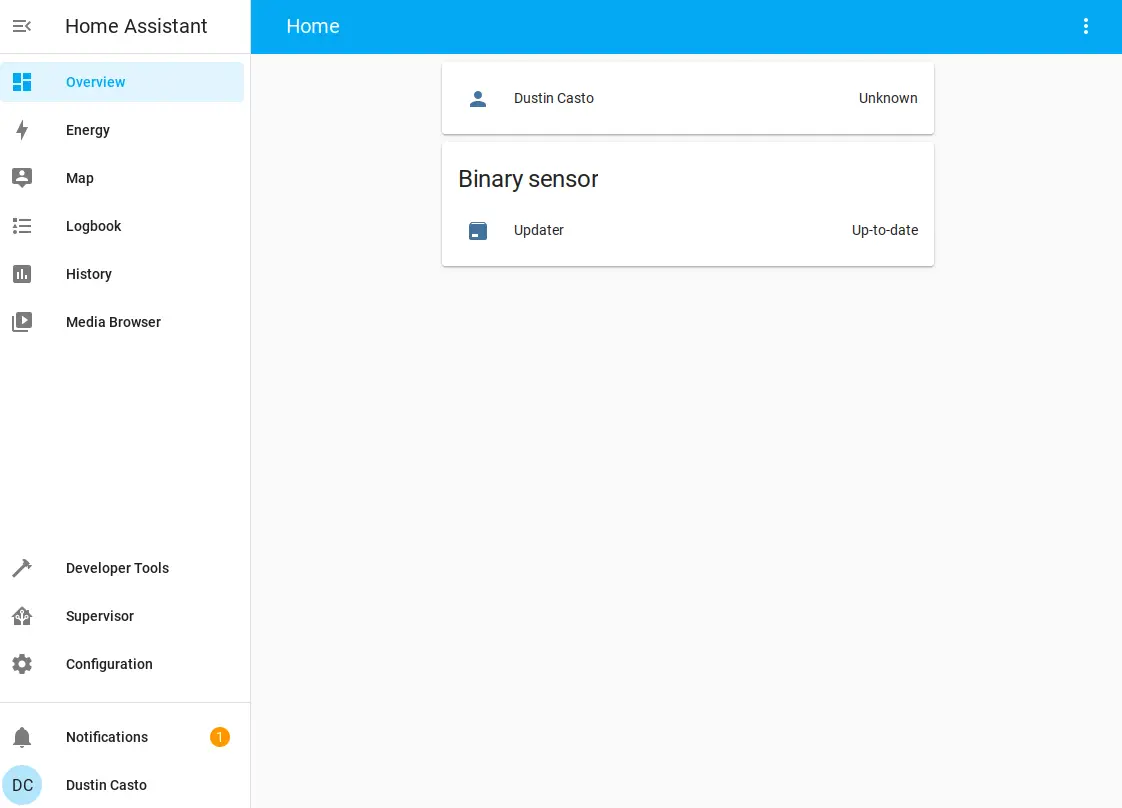
Finally, after the initial configuration, you will see the Home Assistant dashboard! You are now ready to start your own Home Assistant adventure!
Related Posts
How to Set Up Ecosense RadonEye in Home Assistant using a Raspberry Pi as a Bluetooth Proxy
Radon is a dangerous radioactive gas that can be problematic in homes since the gas may concentrate to hazardous levels, which can increase the likelihood of lung cancer over an extended period of time of continual exposure.
Read more
Enable HTTPS using Let’s Encrypt in Home Assistant
In previous guides, I demonstrated how to set up encrypted connections for Home Assistant using either the Nginx Proxy Manager add-on or an existing Nginx Proxy Manager server on your network.
Read more
Chamberlain myQ Alternative
On October 25th, Chamberlain released a statement about revoking 3rd party access to their myQ products. The called the access “unauthorized” but in reality the access was from customers who wish to use their purchased smart home product on their platform of choice such as Home Assistant.
Read more