Enable HTTPS using Let’s Encrypt in Home Assistant
In previous guides, I demonstrated how to set up encrypted connections for Home Assistant using either the Nginx Proxy Manager add-on or an existing Nginx Proxy Manager server on your network.
Both of those methods have one potential disadvantage: you can still access Home Assistant via HTTP which is unencrypted. If you only access your Home Assistant on your local network, it may not be that much of an issue.
Ideally, having HTTPS enabled even for your local services can be beneficial in case something malicious is inside your network sniffing traffic. Of course, if that is occurring, you already have bigger problems but the goal is to minimize the amount of information that is easily accessible to malicious activity.
One reason besides security that you may wish to enable HTTPS is that certain ad-ons like Z-Wave JS UI require HTTPS when provisioning devices using the Smart Start feature. Since this feature is intended for easy, secure inclusion of devices on your Z-Wave network, you must have a secure connection to your Home Assistant installation.
In this guide, I will demonstrate how to use the Let’s Encrypt add-on without using any reverse proxies. The advantage of this approach is that HTTP access is disabled once you enable HTTPS so only encrypted connections are allowed to Home Assistant.
A Note about Dynamic DNS
In the many examples I have seen of the Let’s Encrypt add-on, it is used in conjunction with the DuckDNS add-on– most likely so you can remotely access your home network via the dynamic DNS domain update (perhaps not Home Assistant directly but a VPN server you may have running).
You do not need to configure dynamic DNS to create a certificate and have encrypted local access to Home Assistant since a DNS challenge will be used to obtain a certificate. The advantage of this approach is that you do not need to expose port 80 of your PC/server to the Internet.
I wanted to demonstrate that it is not necessary to use DuckDNS for encrypted local access, but you can use DuckDNS if you want to use a dynamic DNS client to access your network remotely.
I want to note that I do not directly expose my Home Assistant to the Internet, and I do not recommend that you do (basically, do it at your own risk/peril). I use a WireGuard VPN server to connect securely to my home network. When I am connected to the VPN, I can access Home Assistant from my phone exactly like I was at home connected to my WiFi.
Assumptions
I am going to make a few assumptions in this guide in order to stay on topic:
- You own a domain name
- You are using a DNS registrar such as Cloudflare
- You are using a supported DNS registrar for DNS challenges (which I prefer using for services not directly exposed to the Internet)
- The hostname of your Home Assistant system is
homeassistant(if it is not, you simply need to change the URLs referenced in this guide) - Optional: You have the domain name set as the domain for your network (so you can use fully qualified domain names, otherwise you would only use just the hostname)
- Important: Before beginning, a backup of Home Assistant is performed in case anything goes wrong
Install and Configure Let’s Encrypt Add-On
First thing you will need to do is install the Let’s Encrypt add-on. Go to the “Settings > Add-ons” page.
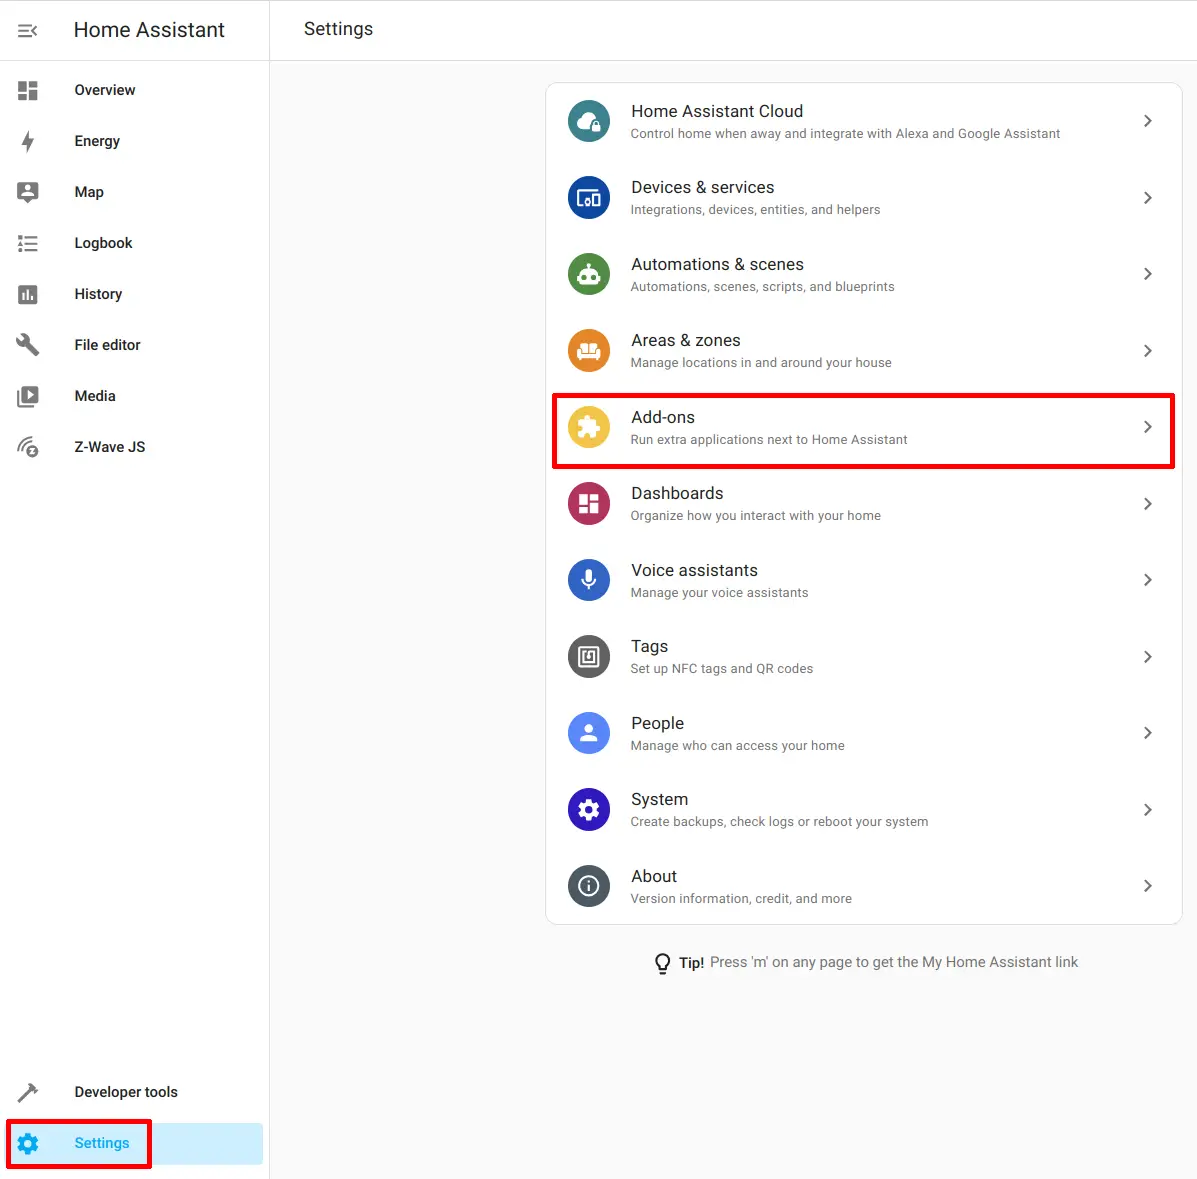
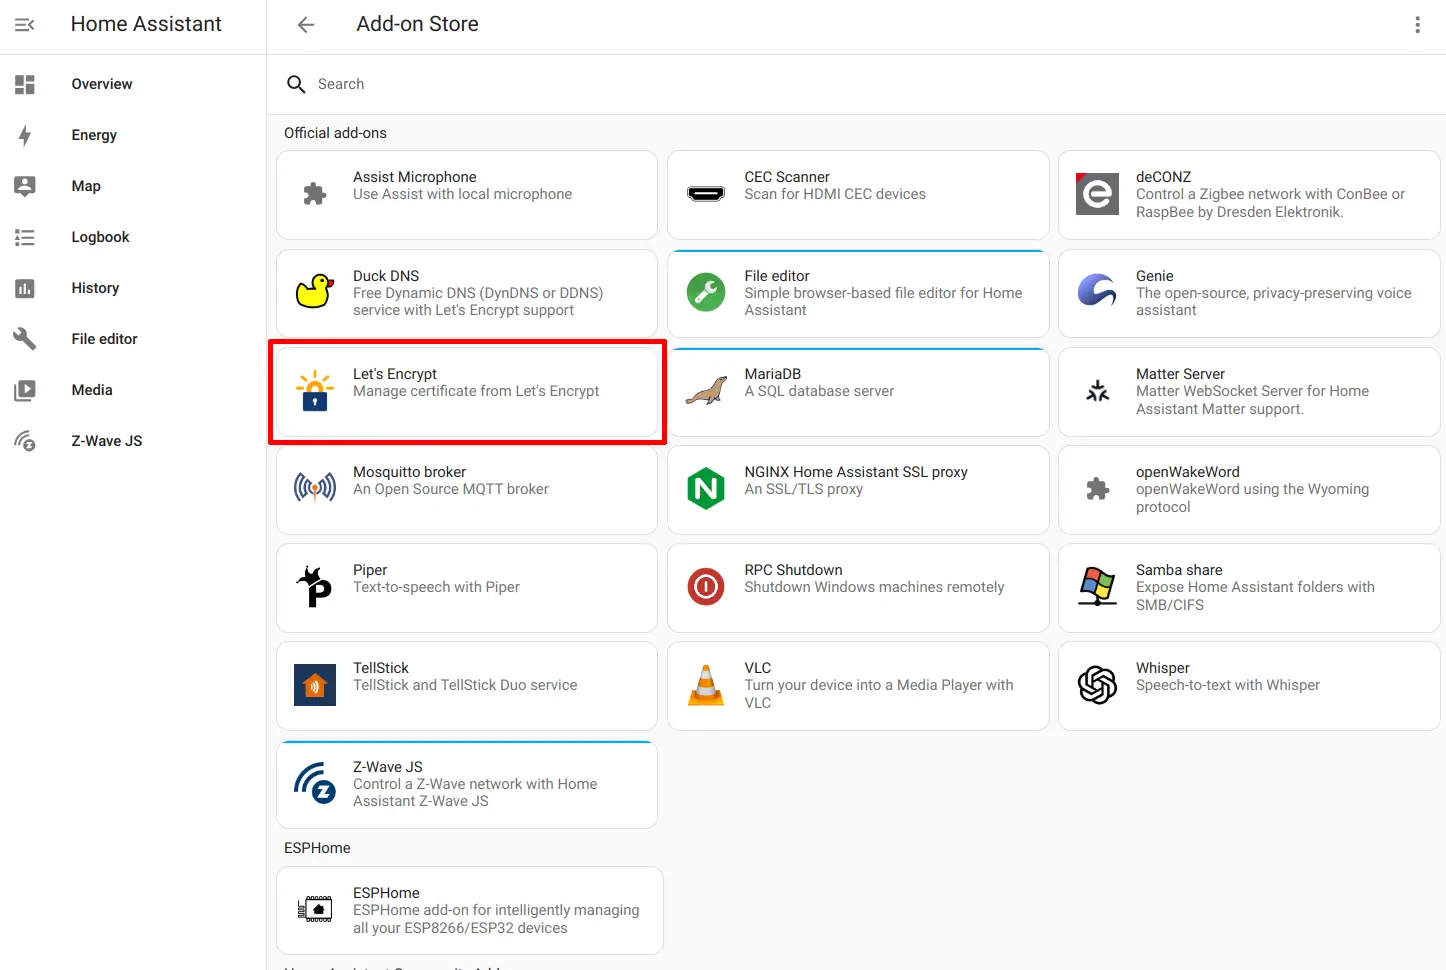
Click on the “Add-on Store” button.
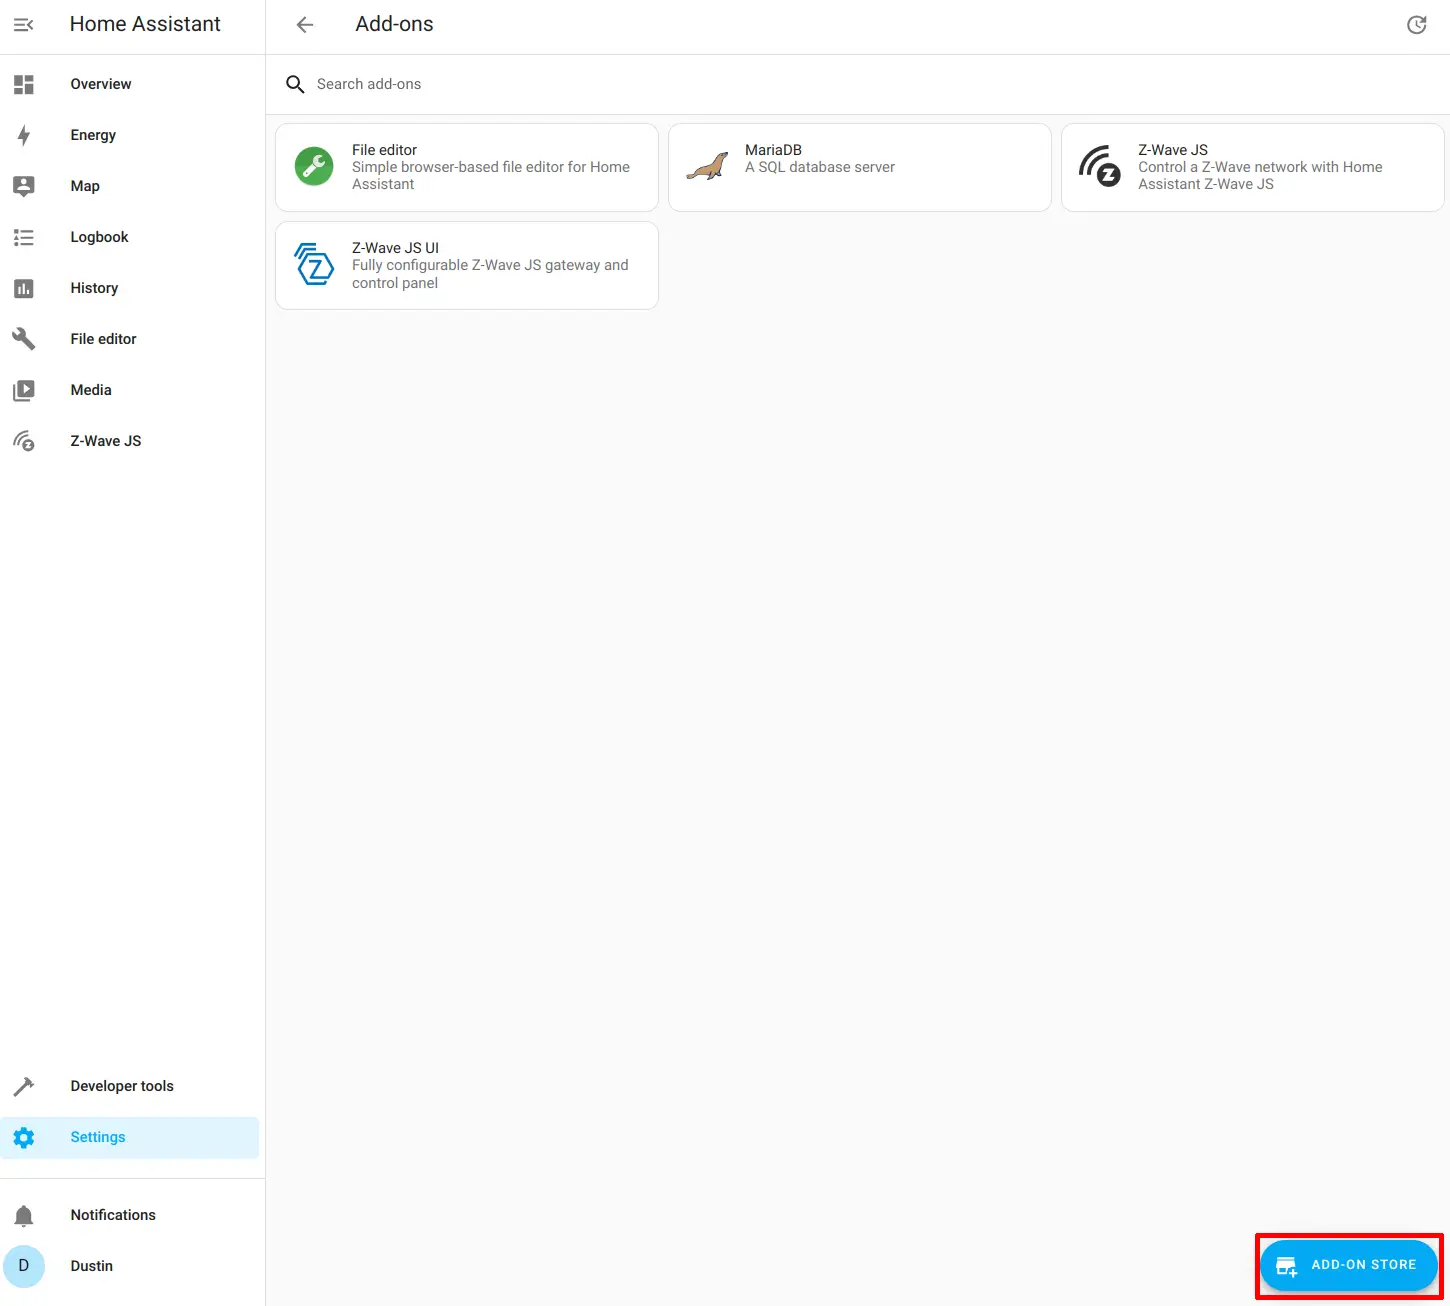
Choose the Let’s Encrypt add-on by clicking on it.
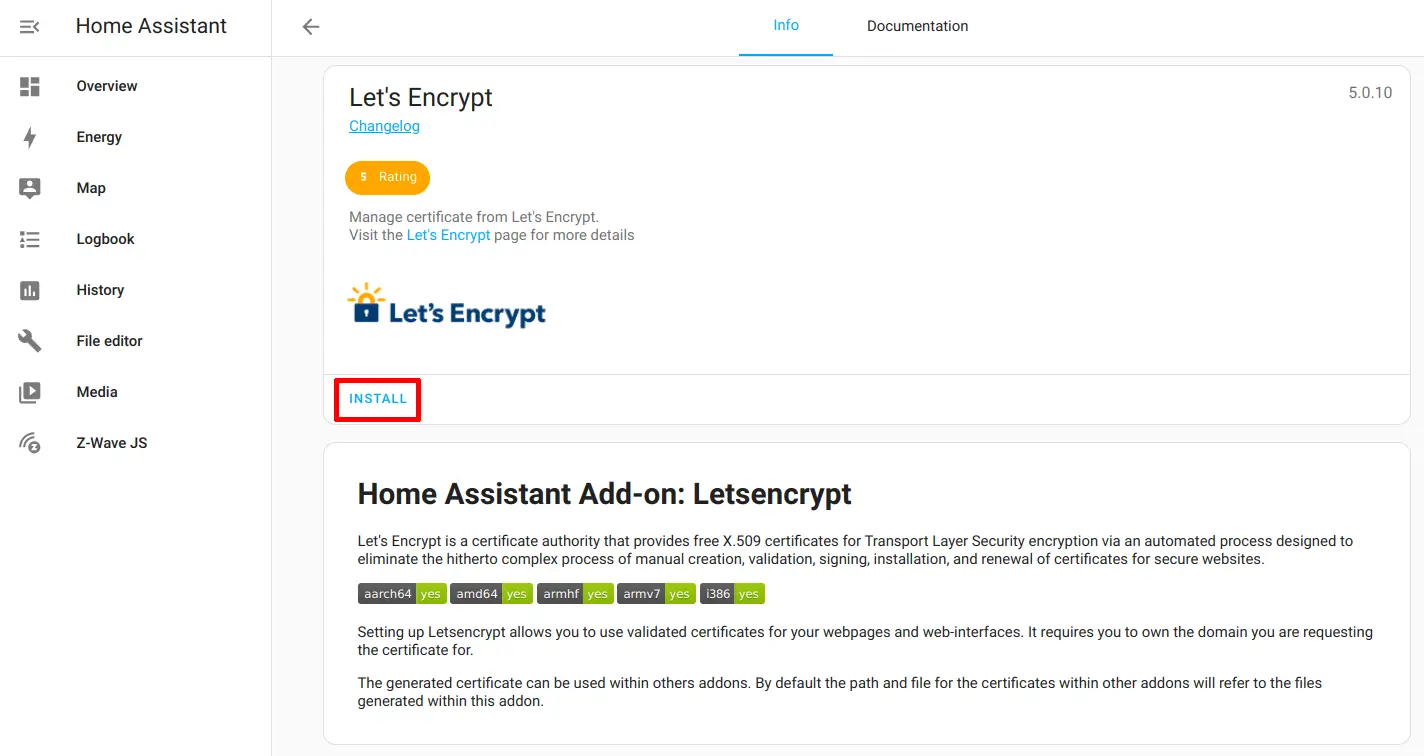
Click the “Install” button to install the add-on.
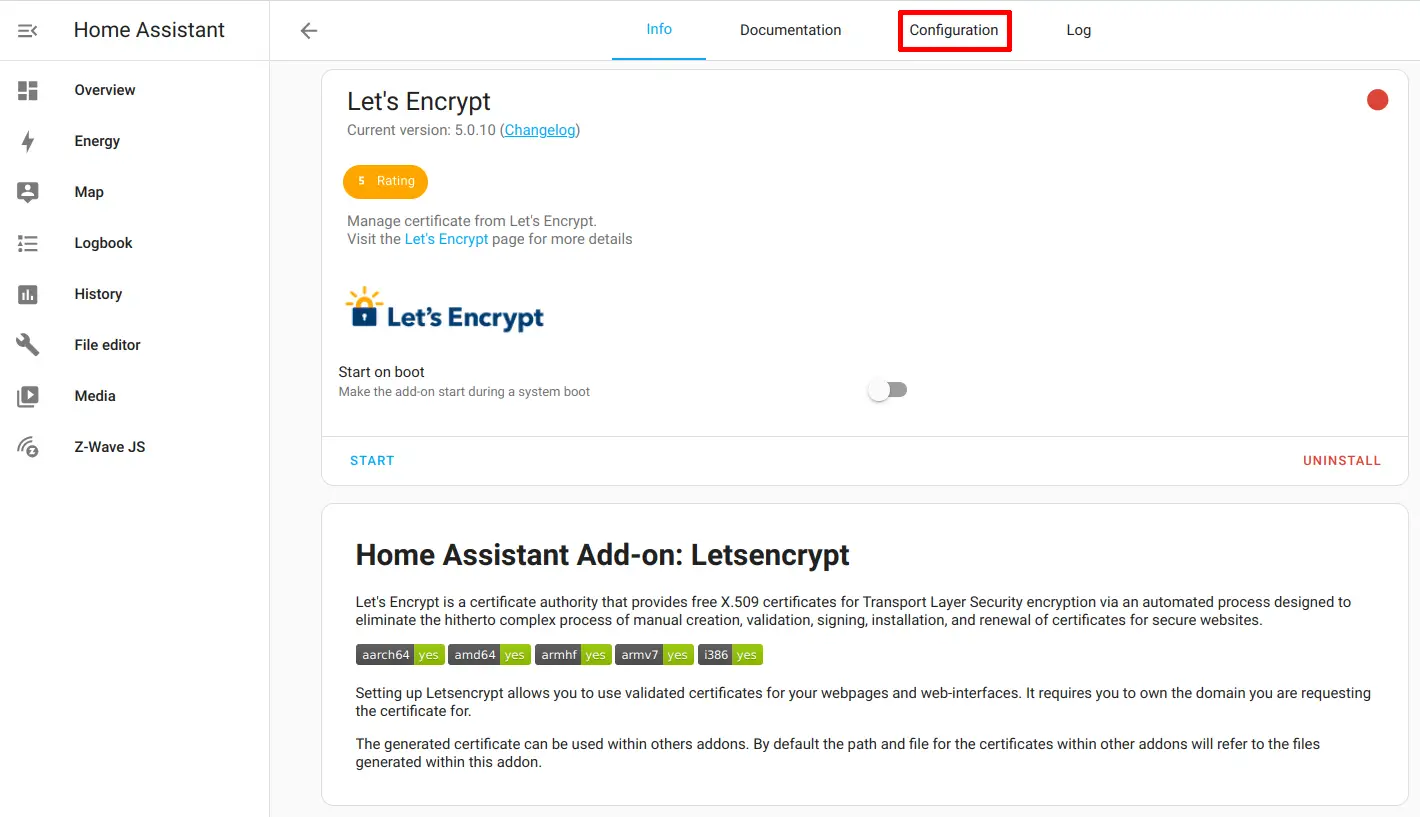
Go to the “Configuration” tab at the top of the page.
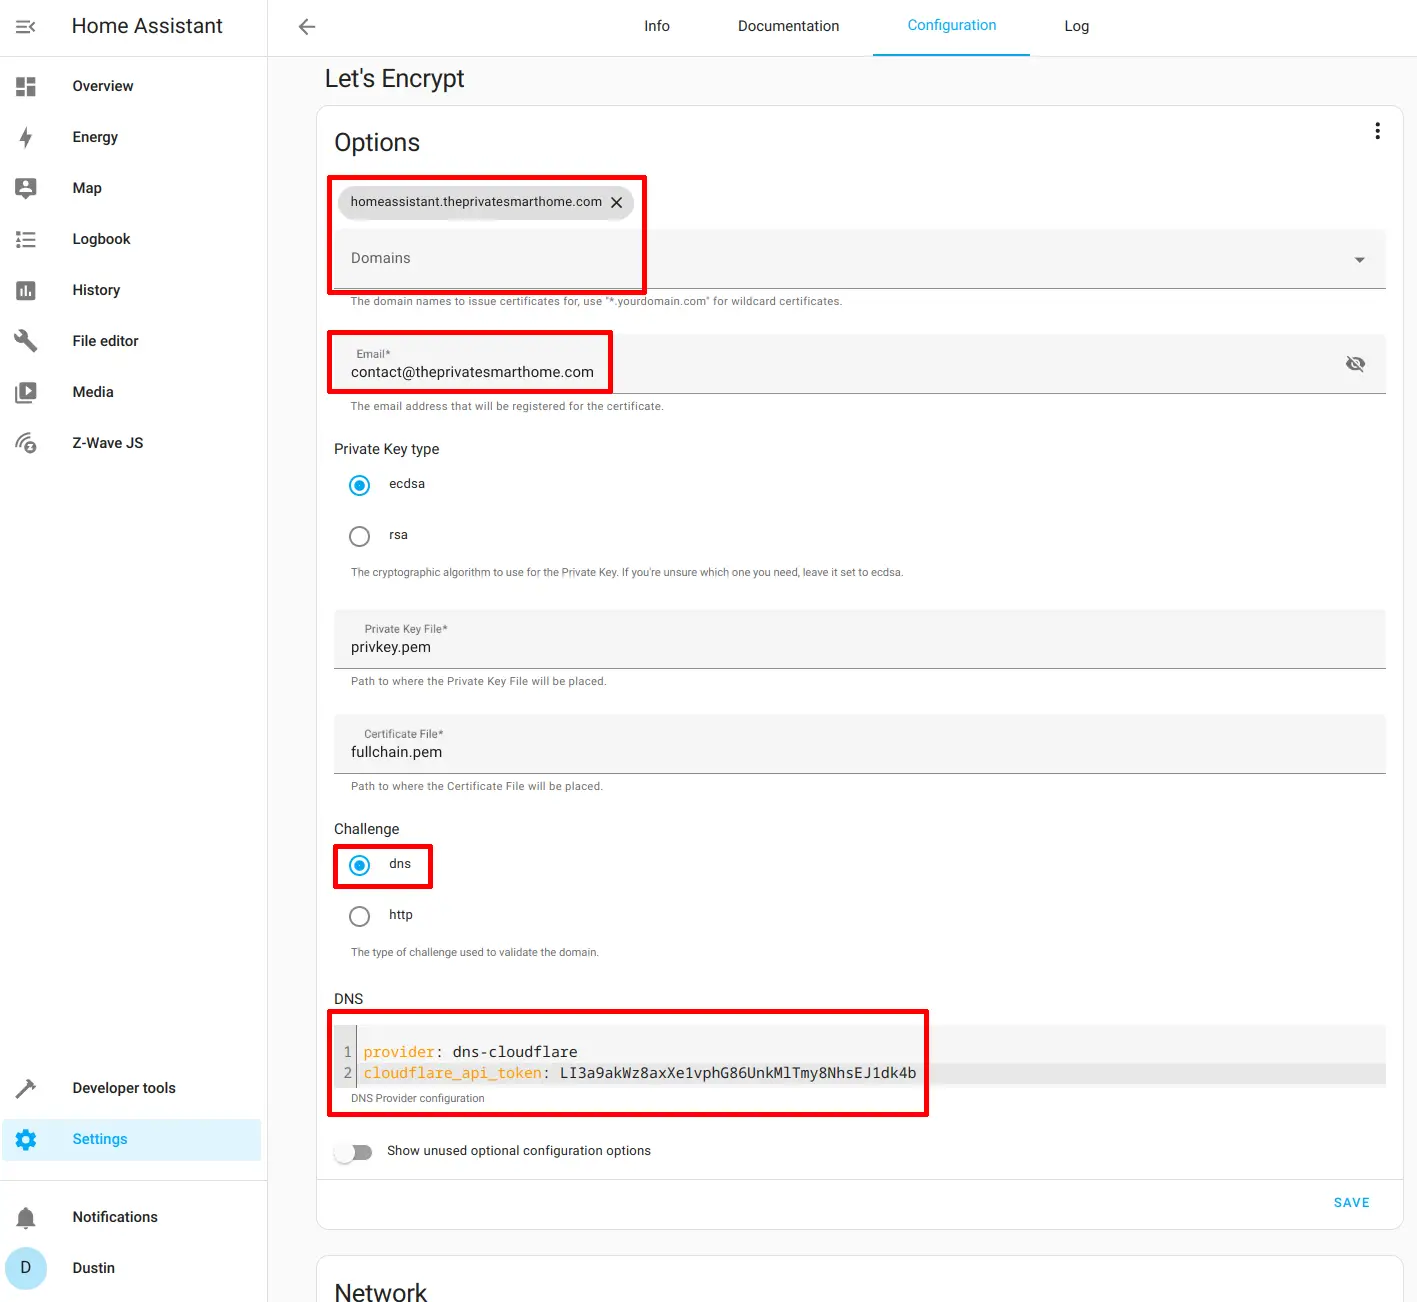
The details on this page will vary depending on the host/domain names used.
Enter the host/domain name such as homeassistant.theprivatesmarthome.com and the email address used for the Let’s Encrypt account that is associated to the generated certificates.
I recommend leaving the “Private Key type” at the default since it is the most secure option.
For this example, a DNS challenge will be used so that you do not need to expose your Home Assistant system to the Internet (however, you must use a support registrar for DNS challenges).
In the “DNS” section, I am using dns-cloudflare as the provider since Cloudflare is on the list for supporting DNS challenges. You will need to create an API token with Cloudflare that allows the “Edit Zone DNS” permission for your domain name so you can use that API key for the cloudflare_api_token.
You will need to change the provider and cloudflare_api_token to the appropriate attribute depending on your DNS registrar used. For example, if you are using Namecheap, you would want to use the provider of dns-namecheap and namecheap_username and namecheap_api_key instead of cloudflare_api_token.
provider: dns-cloudflare
cloudflare_api_token: LI3a9akWz8axXe1vphG86UnkMlTmy8NhsEJ1dk4b
(In case you are wondering, the Cloudflare token above is just a made up value and not a real token)
Click the “Save” button to save the configuration.
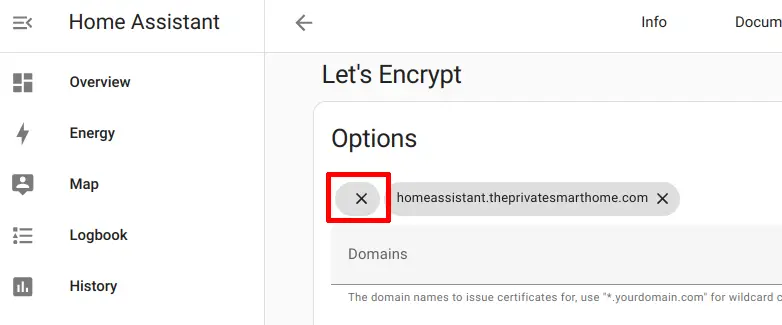
I wanted to point out one possible issue you could encounter if you are not careful. If you see a message such as below when saving the configuration, there may be a blank domain name already entered at the top of the page. This happened to me when I was testing out setting up this add-on. Seems like after reinstalling the add-on that the first time you go to the configuration there is a blank domain name already entered at the top where it just shows an “X” (see the next screenshot).

If you got the error message, you should see at the top of the page an “X” with no domain name in it. Simply click the “X” to remove that blank entry and then click the “Save” button again.
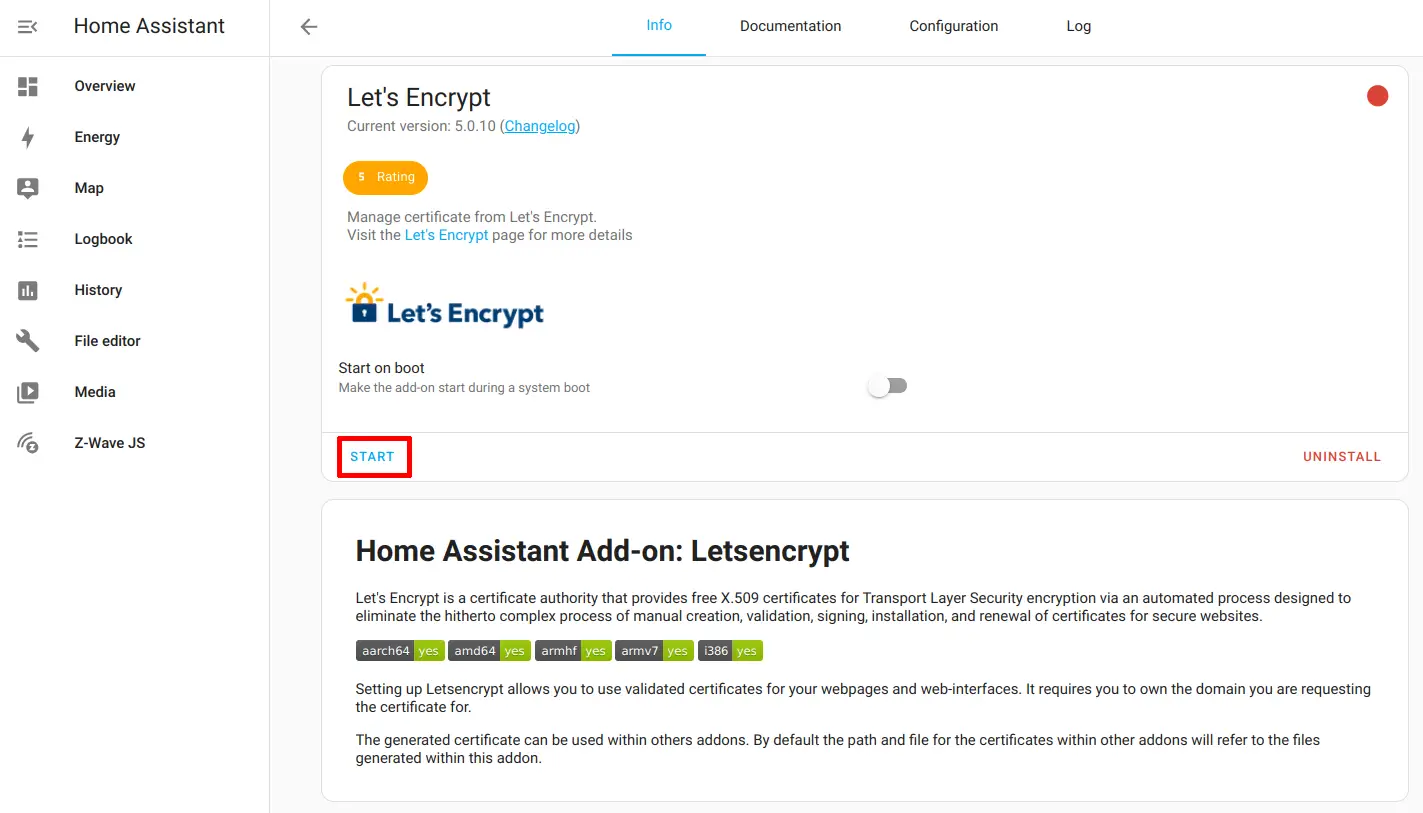
Now you should be able to go back to the “Info” tab and click “Start” to run the Let’s Encrypt add-on.
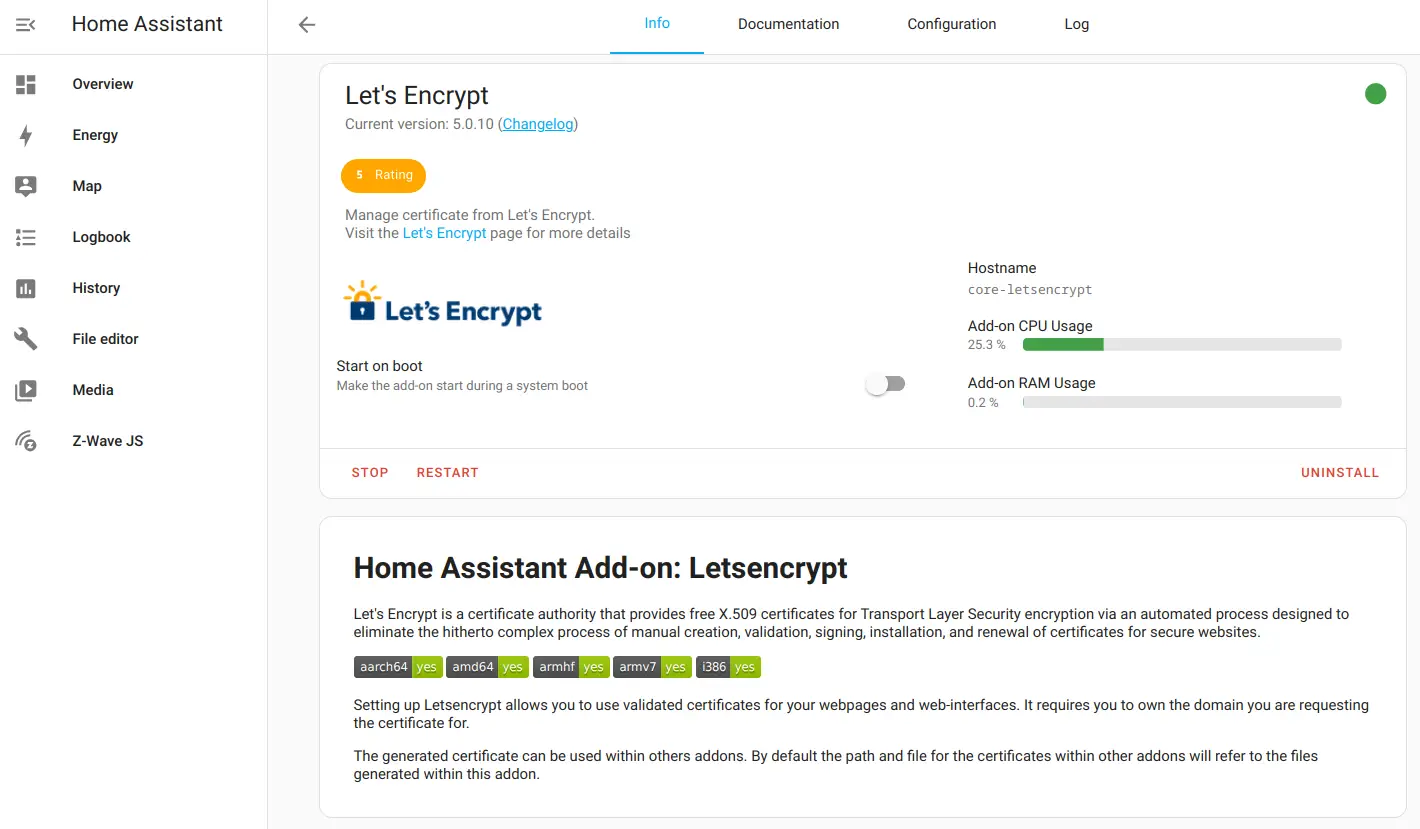
You should see the information that the add-on is running.
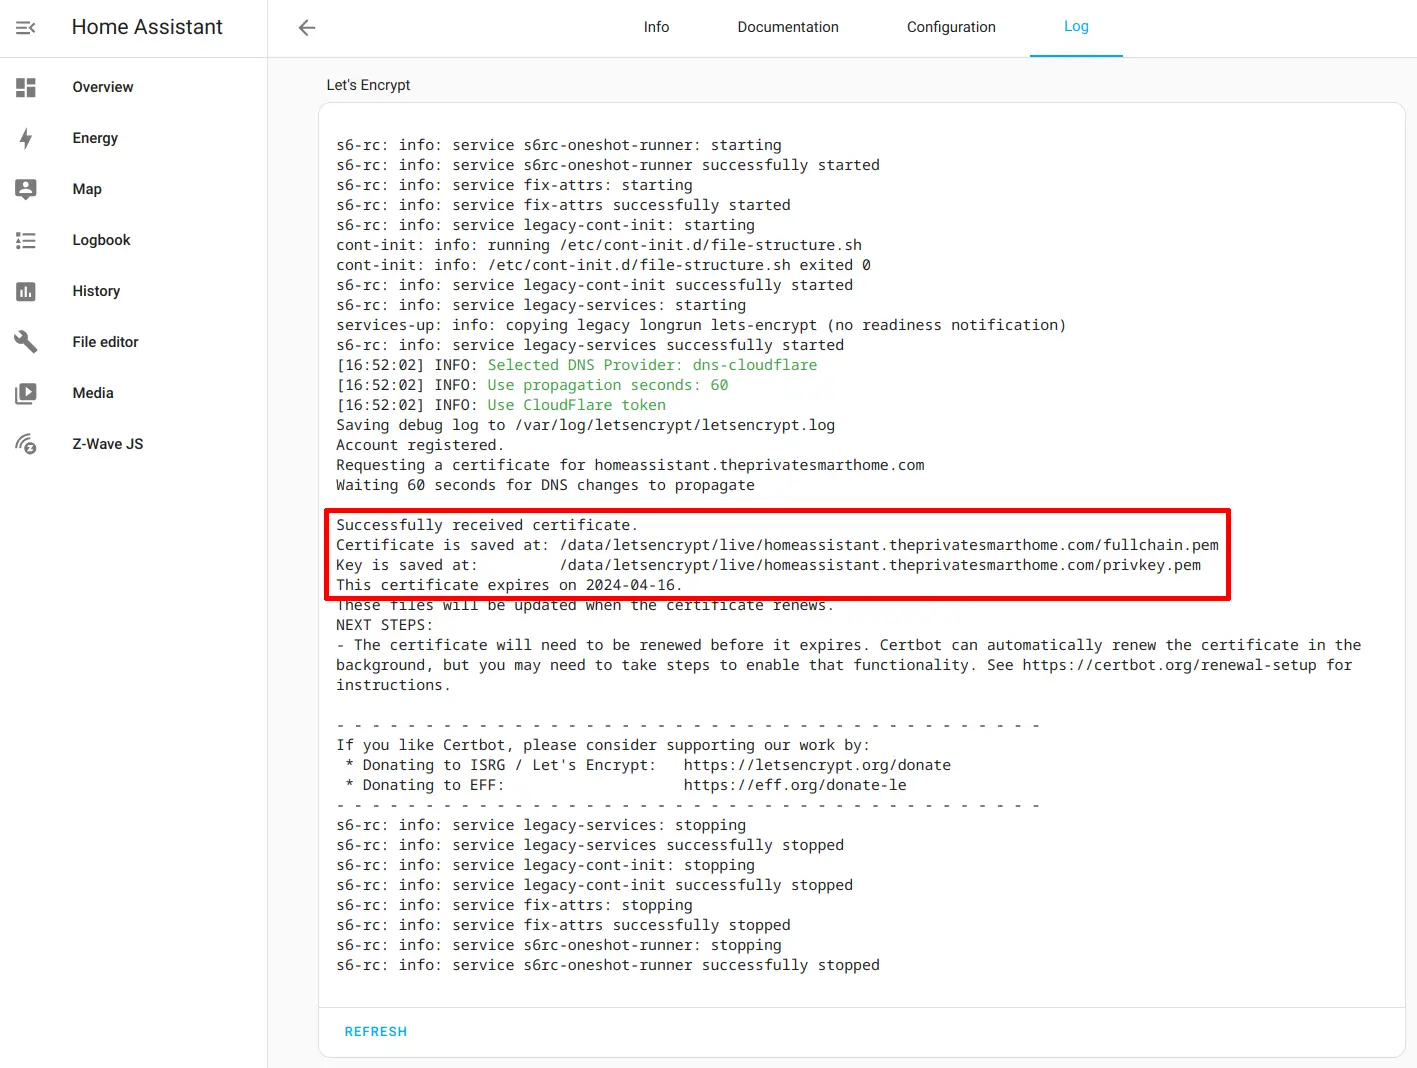
Go to the “Log” page so you can see if the certificate was generated successfully. This process will take at least 1 minute since the add-on waits to ensure the certificate was issued properly.
After the 60 seconds, you should see the message below about successfully receiving the certificate. The Let’s Encrypt add-on will shut down after obtaining a certificate.
Update Home Assistant Configuration
Now that a certificate has been generated and received, the Home Assistant configuration needs to updated to enable HTTPS. The nice thing about the way the Let’s Encrypt add-on was designed, the certificate is automatically available to other add-ons and Home Assistant itself.
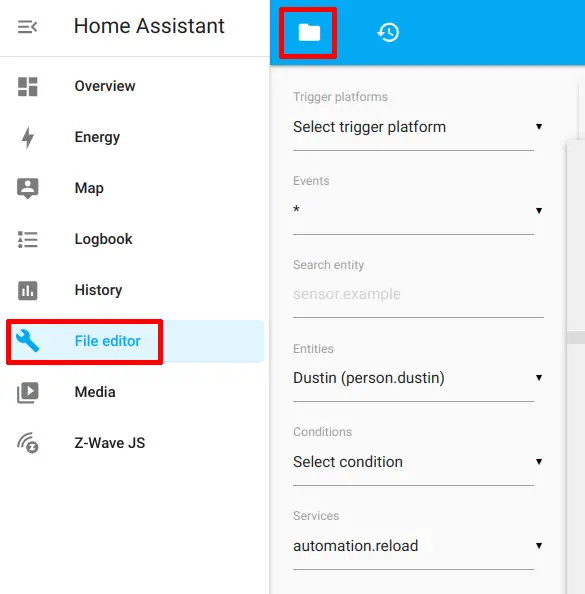
I like using the basic “File Editor” add-on for simple configuration updates in Home Assistant. Click on the “File Editor” and then the folder icon at the top of the page.
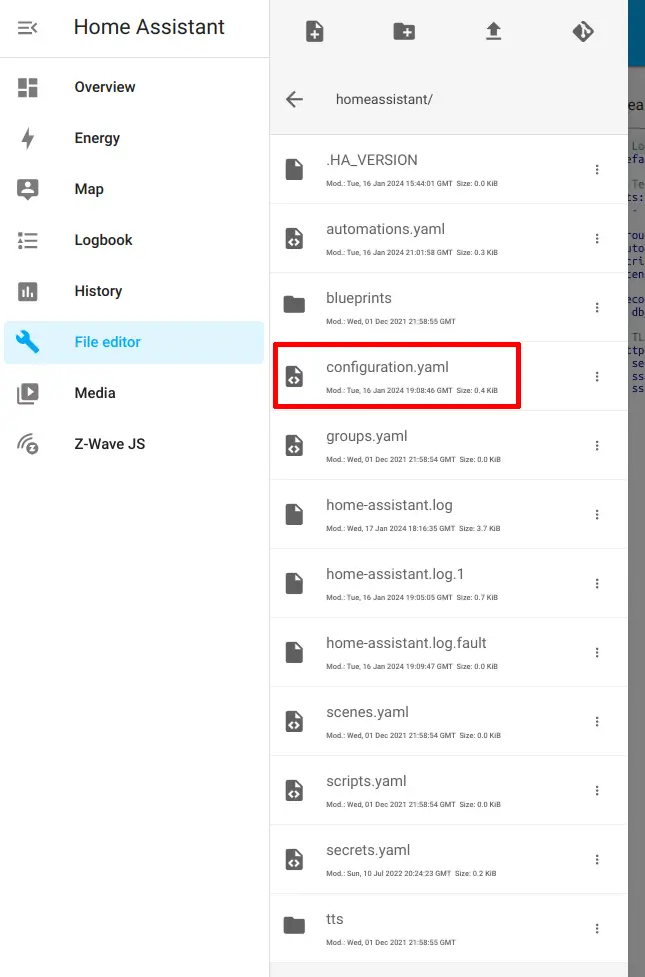
You should see a list of all of the Home Assistant configuration files. Click on the configuration.yaml file to open it in the editor.
All you need to do is add the configuration below to the bottom of the configuration file. You may use a different port if you are running Home Assistant in Docker with other apps, but since I am using Home Assistant on a dedicated device, I will use the default HTTPS port of 443 so that I do not have to enter port numbers to access Home Assistant.
# TLS with letsencrypt add-on
http:
  server_port: 443
  ssl_certificate: /ssl/fullchain.pem
  ssl_key: /ssl/privkey.pem
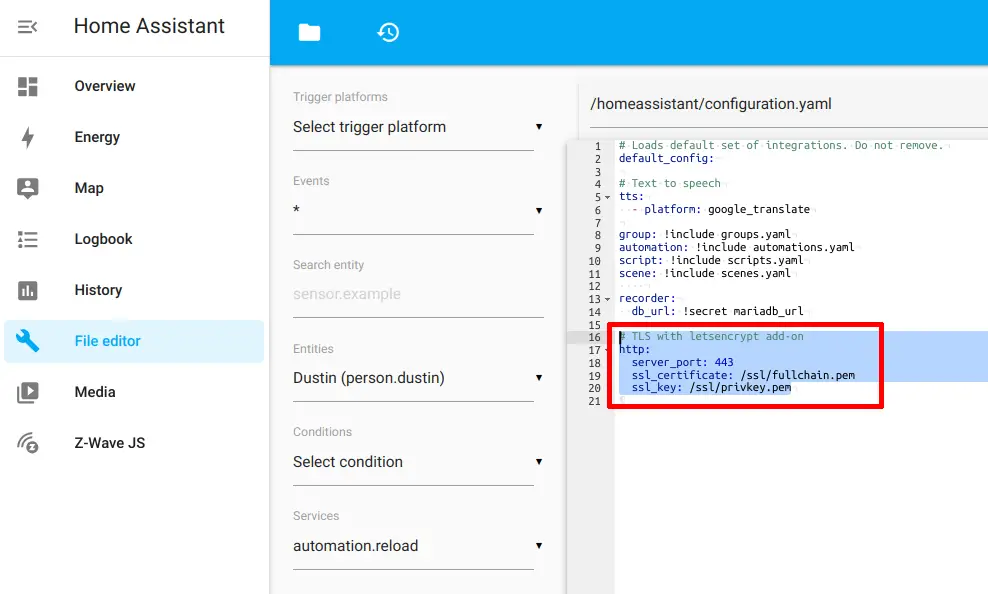
Click the save icon at the top of the page to save your changes.
Restart Home Assistant
Once you update the Home Assistant configuration, you will need to restart Home Assistant. After Home Assistant boots, you will need to access the web interface using HTTPS similar to my example: https://homeassistant.theprivatesmarthome.com.
If you do not wish to use the fully qualified domain name (FQDN), you should be able to simply enter: https://homeassistant. Please note that if you just use the hostname of homeassistant, the web browser will display a warning message that the name does not match the certificate. To avoid the warnings, you need to have your domain name set up as the domain for your network so that you can use FQDN addresses for your locally hosted services.
Notice that you no longer need to enter the port number of 8123 since the configuration uses port 443.
If you try to access the HTTP URL, you will see that it is no longer accessible. Only encrypted HTTPS connections are allowed!
One thing you must keep in mind if you are using the Home Assistant mobile app is that you will need to manually enter the Home Assistant server address because by default the app only searches for the HTTP address on port 8123. However, that is a minor inconvenience you must experience in order to have encrypted local access to Home Assistant (this same situation also applies to the alternative reverse proxy methods mentioned at the beginning of this guide).
Create Automation to Renew Certificate
Unlike using Nginx Proxy Manager, the certificates do not renew automatically. This is easily remedied by creating an automation to renew the certificate. Simply opening the Let’s Encrypt add-on will check if the certificate is due for renewal so the only action the automation needs to perform is opening the Let’s Encrypt add-on on a periodic basis. The automation prevents the need of manually opening the Let’s Encrypt add-on to renew the certificate.
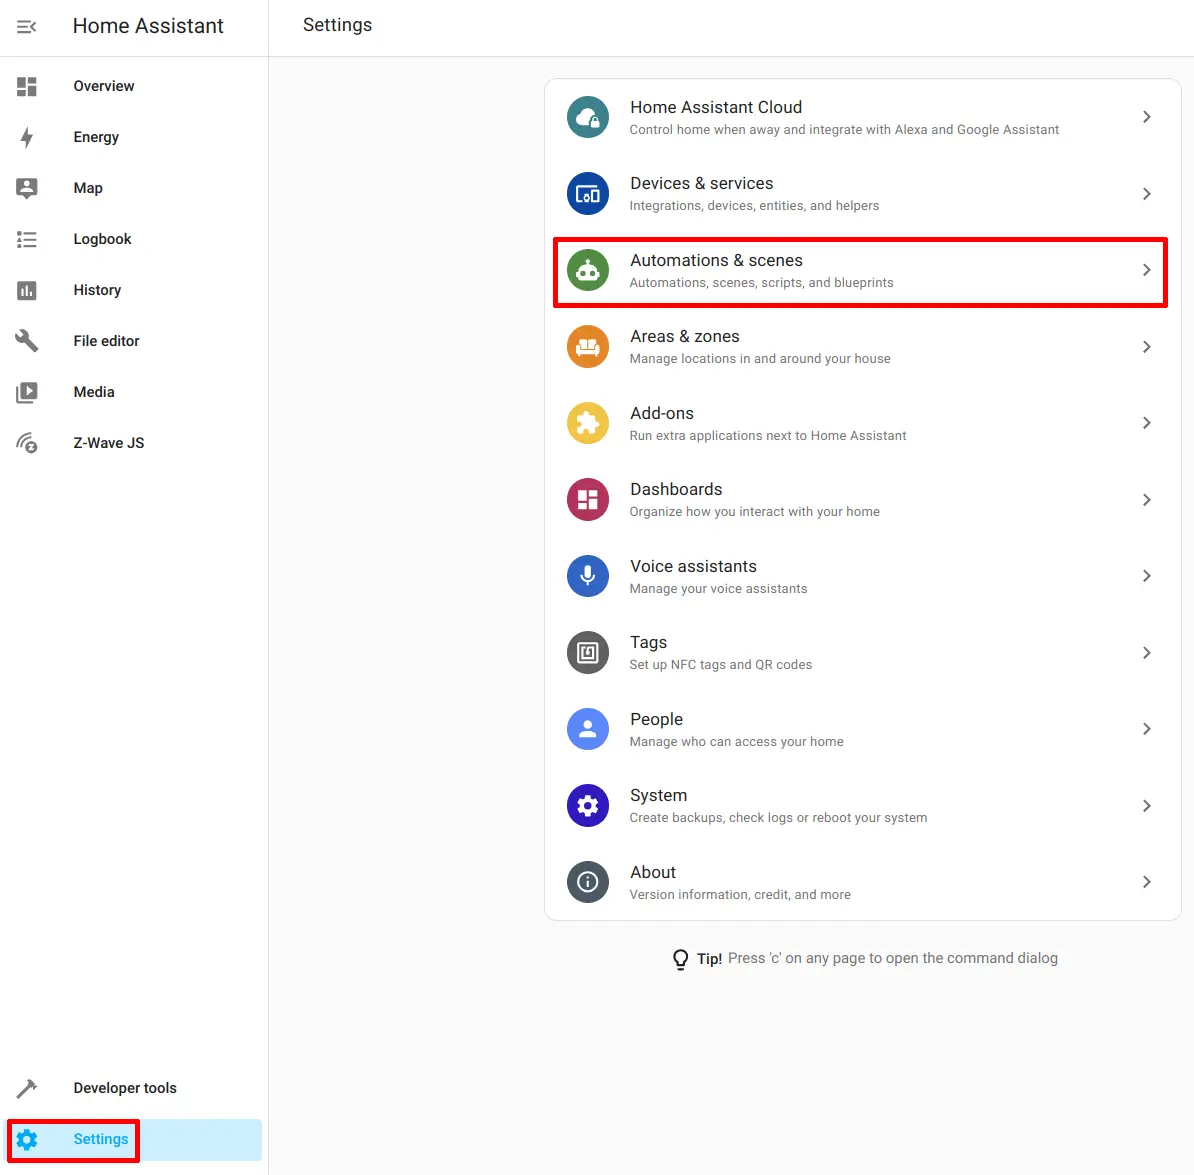
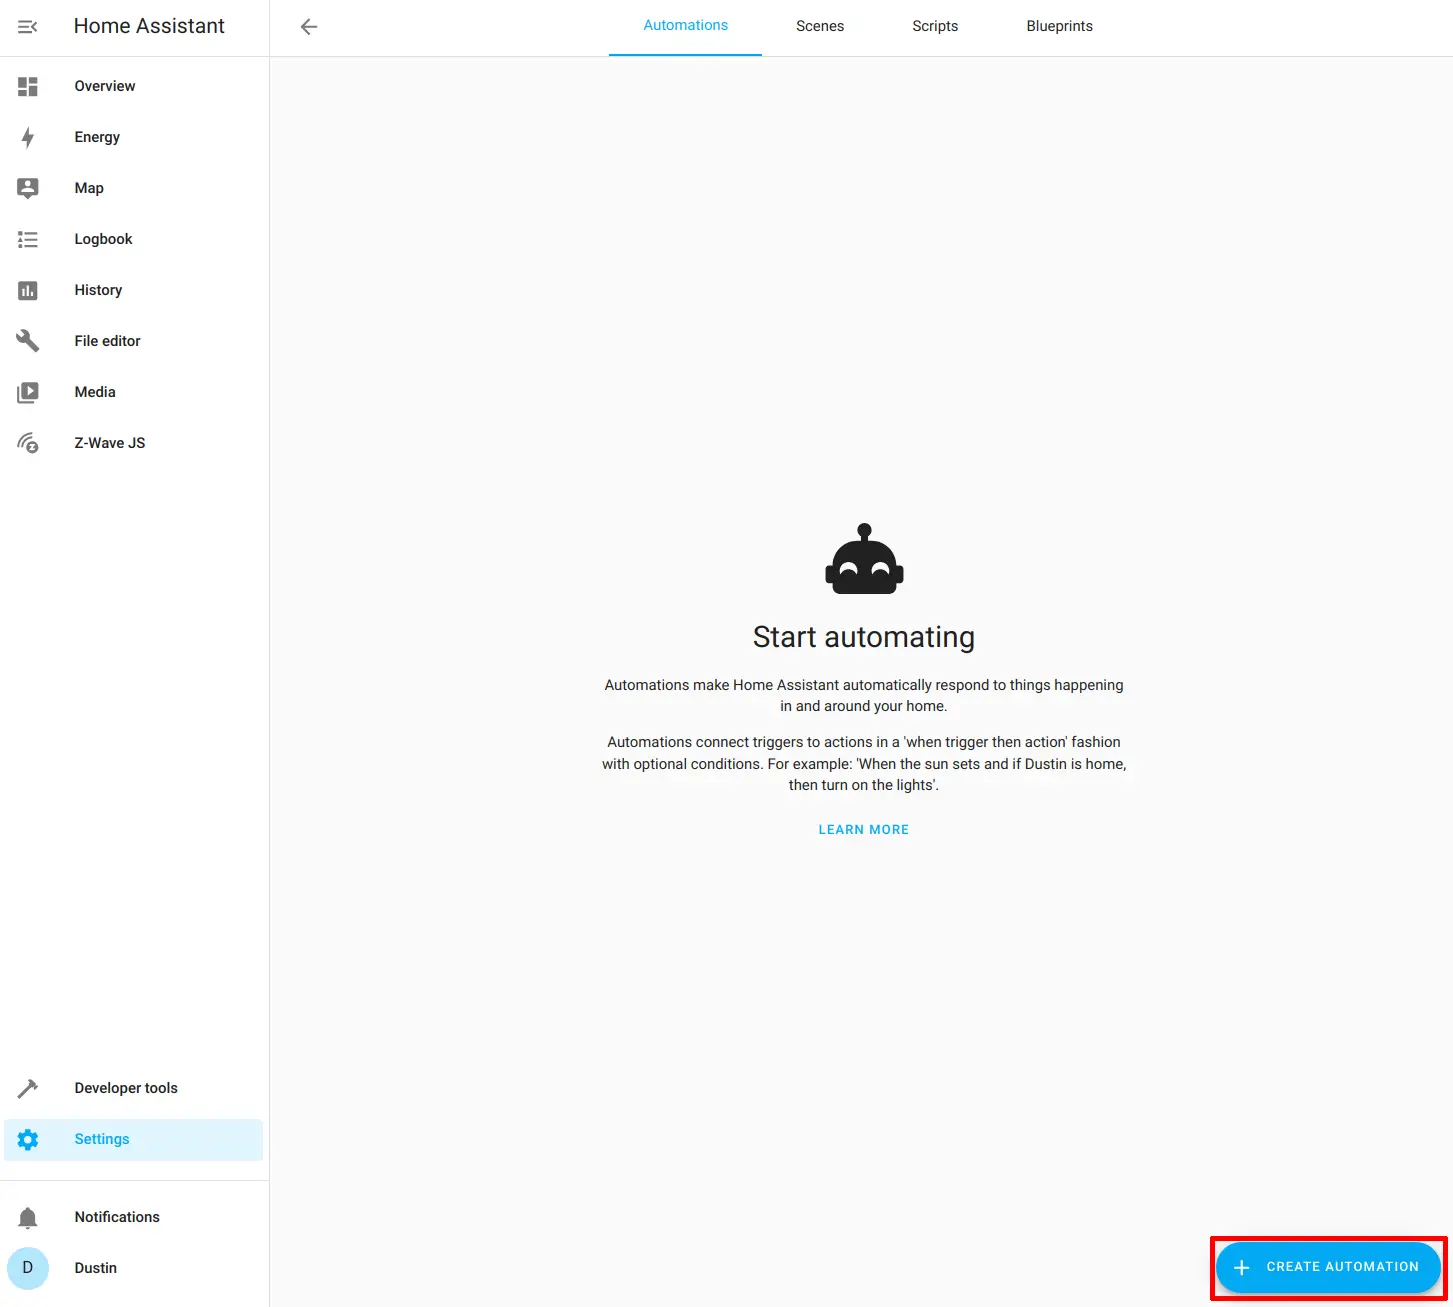
Navigate to the “Settings > Automations & scenes” page.
Click on the “Create Automation” button.
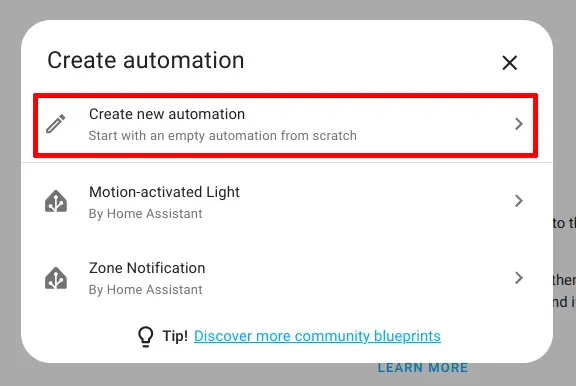
Choose “Create new automation”.
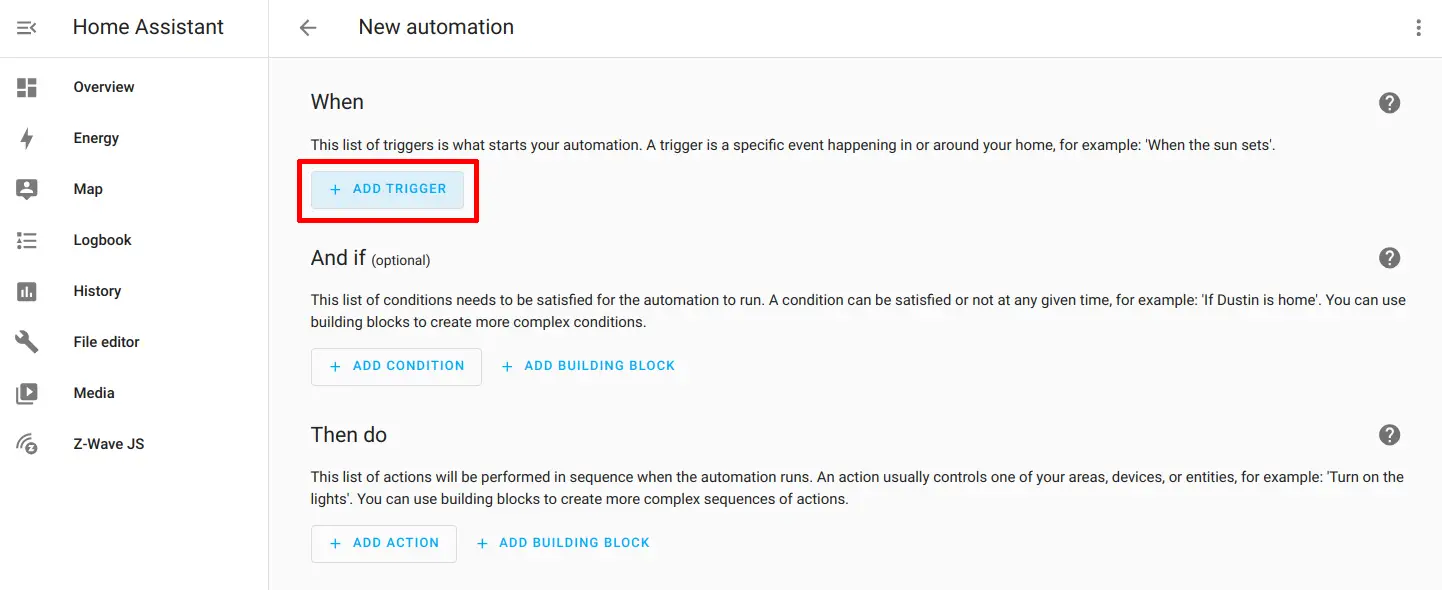
Click on the “Add Trigger” button to create a new trigger for the automation.
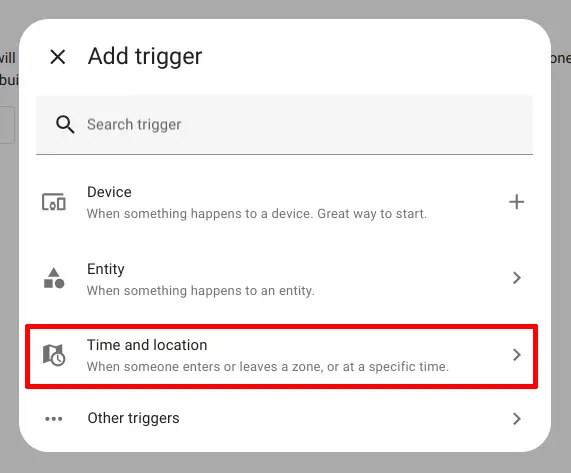
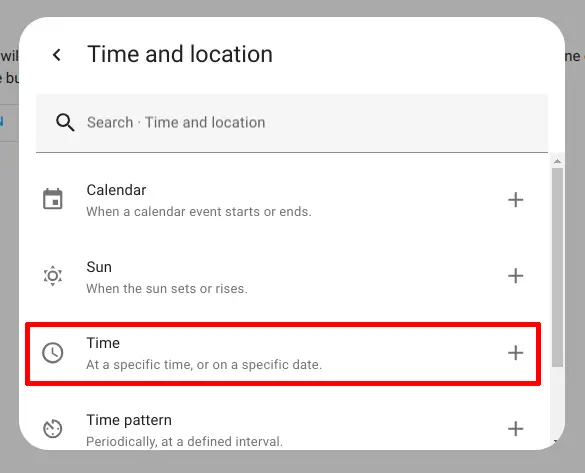
Since it is often recommended to check for certificate renewals daily, choose the “Time and location” option.
Choose “Time” so you can run the certificate check daily at a specific time.
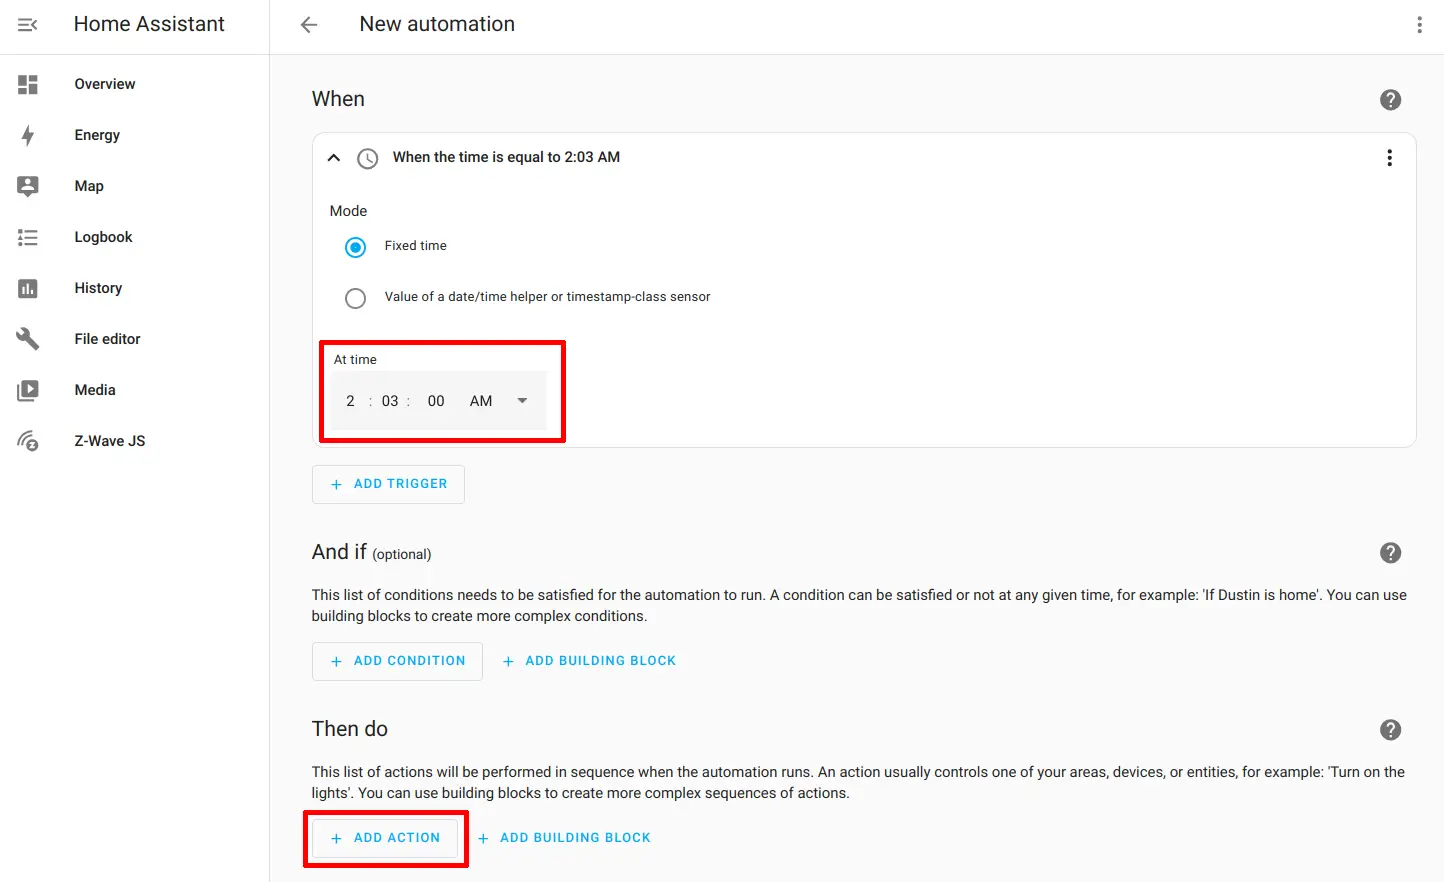
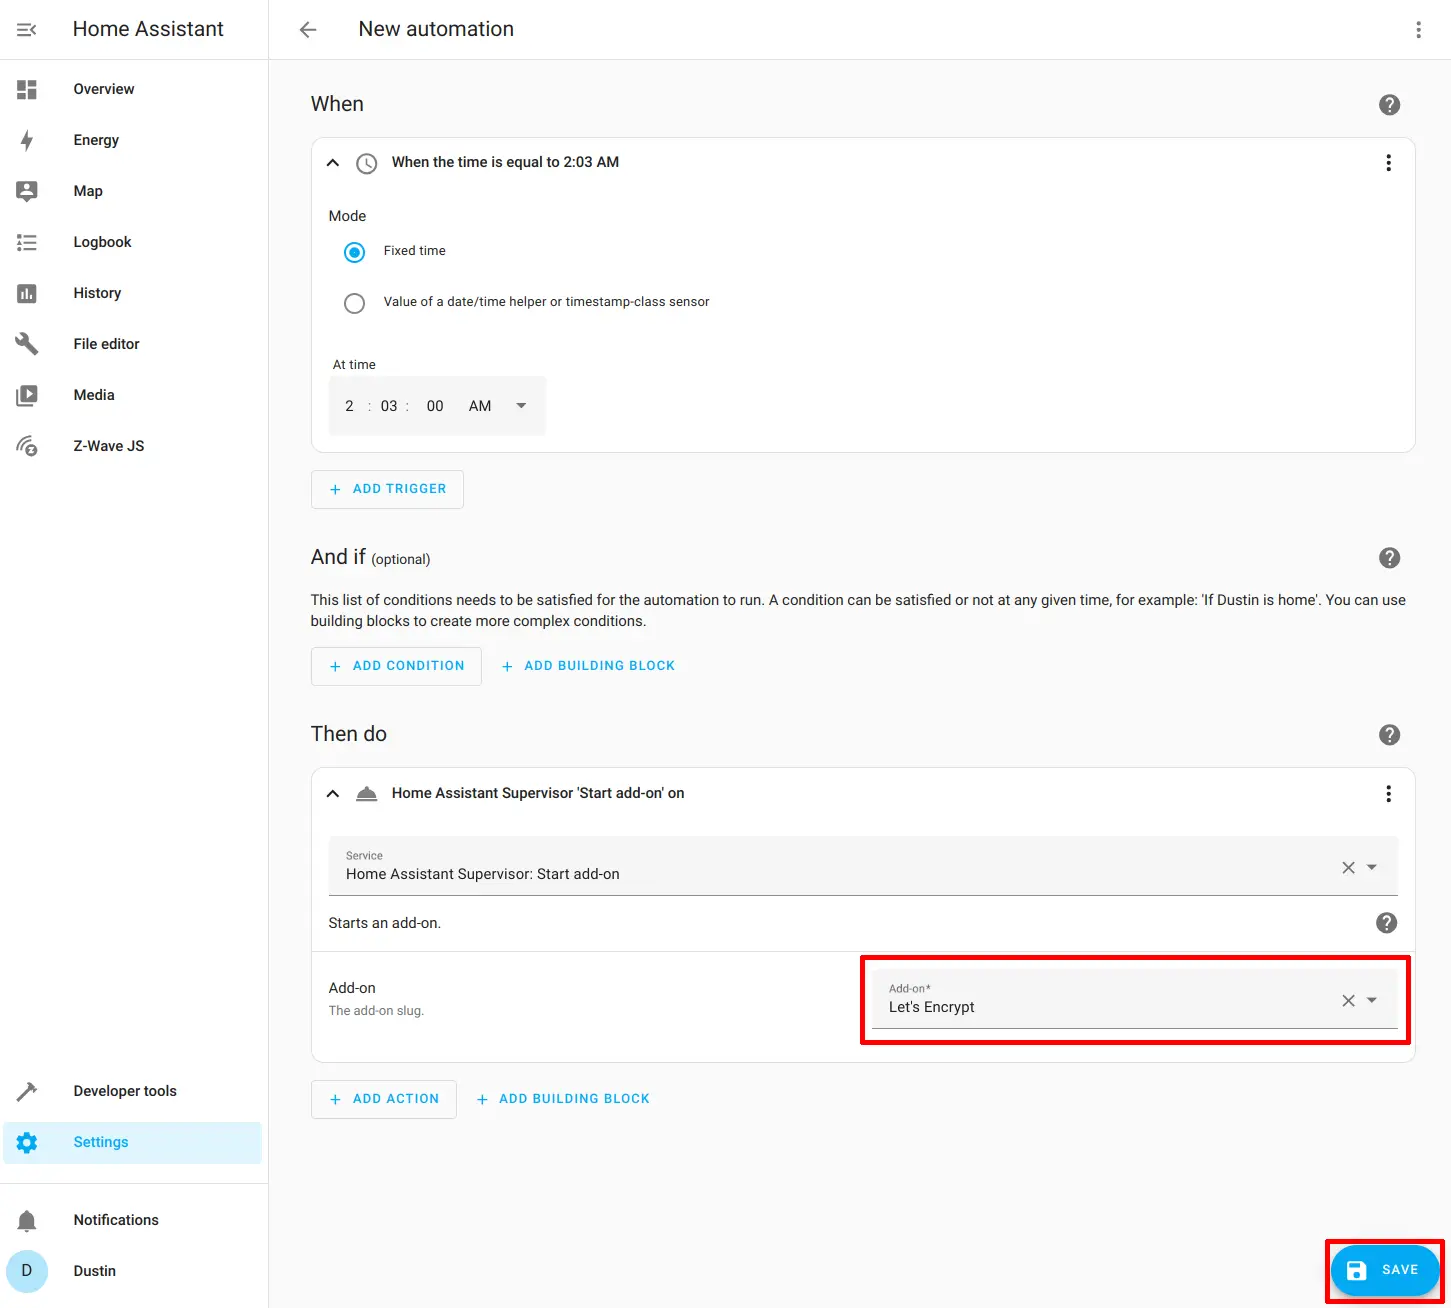
I have seen it recommended in the past to choose an odd time like a specific minute within whatever hour you wish to renew so that not a lot of clients are trying to renew at exactly on the hour intervals. That is why I chose a random time such as 2:03 am.
Click on the “Add Action” button at the bottom of the automation.
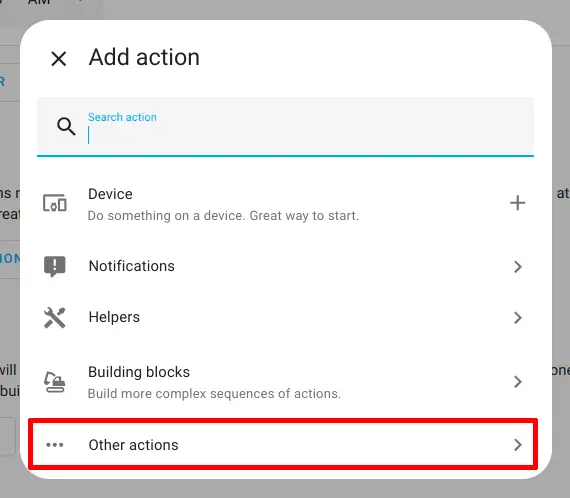
Choose “Other actions”.
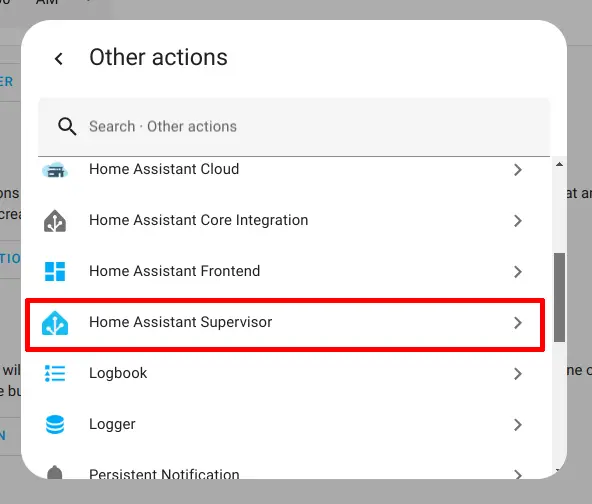
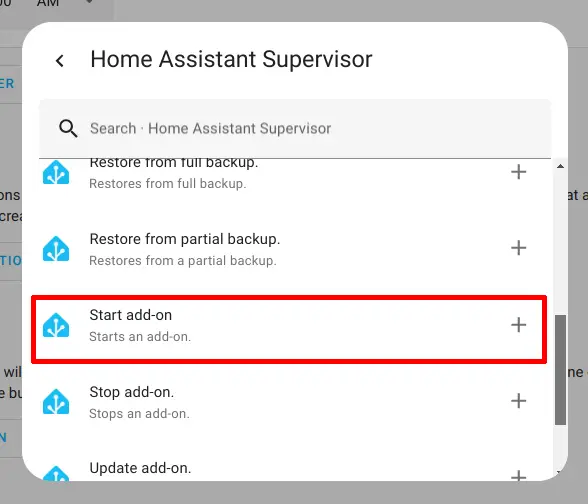
Scroll down until you see “Home Assistant Supervisor”. Selecting this option will bring up additional actions you may perform.
Scroll until you see the “Start add-on” option and then click on it.
Select the “Let’s Encrypt” add-on at the bottom of the action that was just added. Click the “Save” button when you are finished.
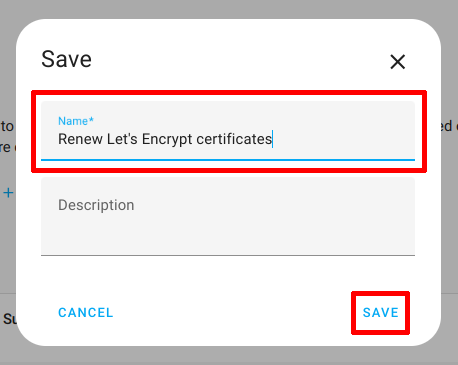
Simply enter a descriptive name for the automation so you know what it is used for.
You can check back later on the “Automations” page to see the last time the automation was executed and you may also visit the “Log” page of the Let’s Encrypt plugin to verify that the automatic renewal process is working properly.
That is all you need to do to start using encrypted connections with Home Assistant!
I hope this guide has helped you set up Home Assistant to only allow encrypted connections!
Related Posts

How to Set Up Nginx Proxy Manager in Home Assistant
If you wish to have secure connections to Home Assistant, a reverse proxy may be used. The proxy can reside on the same system (as demonstrated in this guide) or on another system as I have demonstrated in a previous guide.
Read more
Chamberlain myQ Alternative
On October 25th, Chamberlain released a statement about revoking 3rd party access to their myQ products. The called the access “unauthorized” but in reality the access was from customers who wish to use their purchased smart home product on their platform of choice such as Home Assistant.
Read more