Create a Basic Automation in Home Assistant
When you have Home Assistant running with at least one smart device configured, you are ready to start creating automations! Automating tasks in your home is one reason to create a smart home.
For this example considering it is near Christmas, I thought it would be appropriate to demonstrate a basic automation of turning on Christmas lights. Rather than simply picking the same time every day when it gets dark, it is possible to make the automation slightly fancier by using the sunset time based on your location when you first set up Home Assistant. This relies on you picking a relatively accurate location for your home. The time for sunset will be based on location and perhaps elevation as well. Time zones are accounted for as well. When I tested this automation, I found that it works quite well. One nice thing about using the sunset is that over a span of a month or two (depending on how long you leave your lights up), the sunset time will adjust as the days get shorter or longer.
Create the Automation
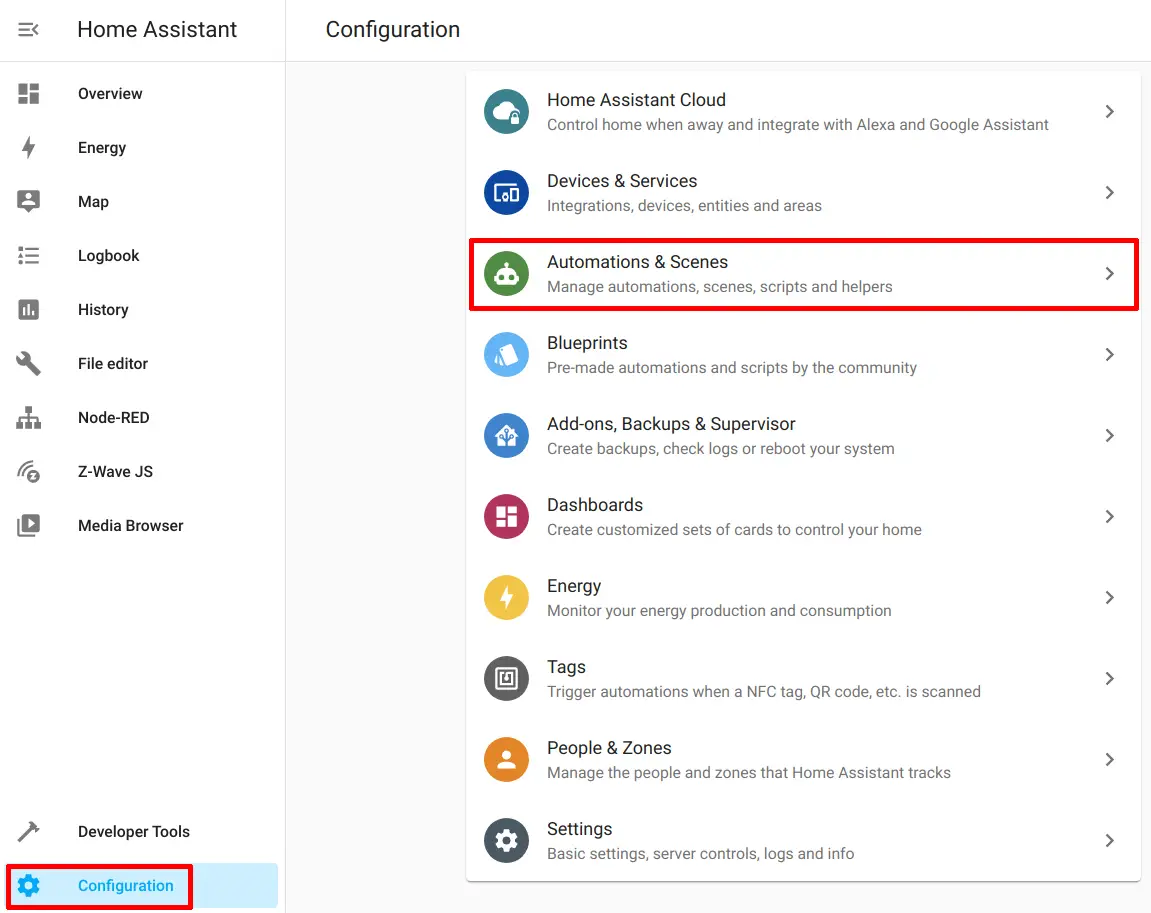
Click on the “Configuration > Automations & Scenes” page.
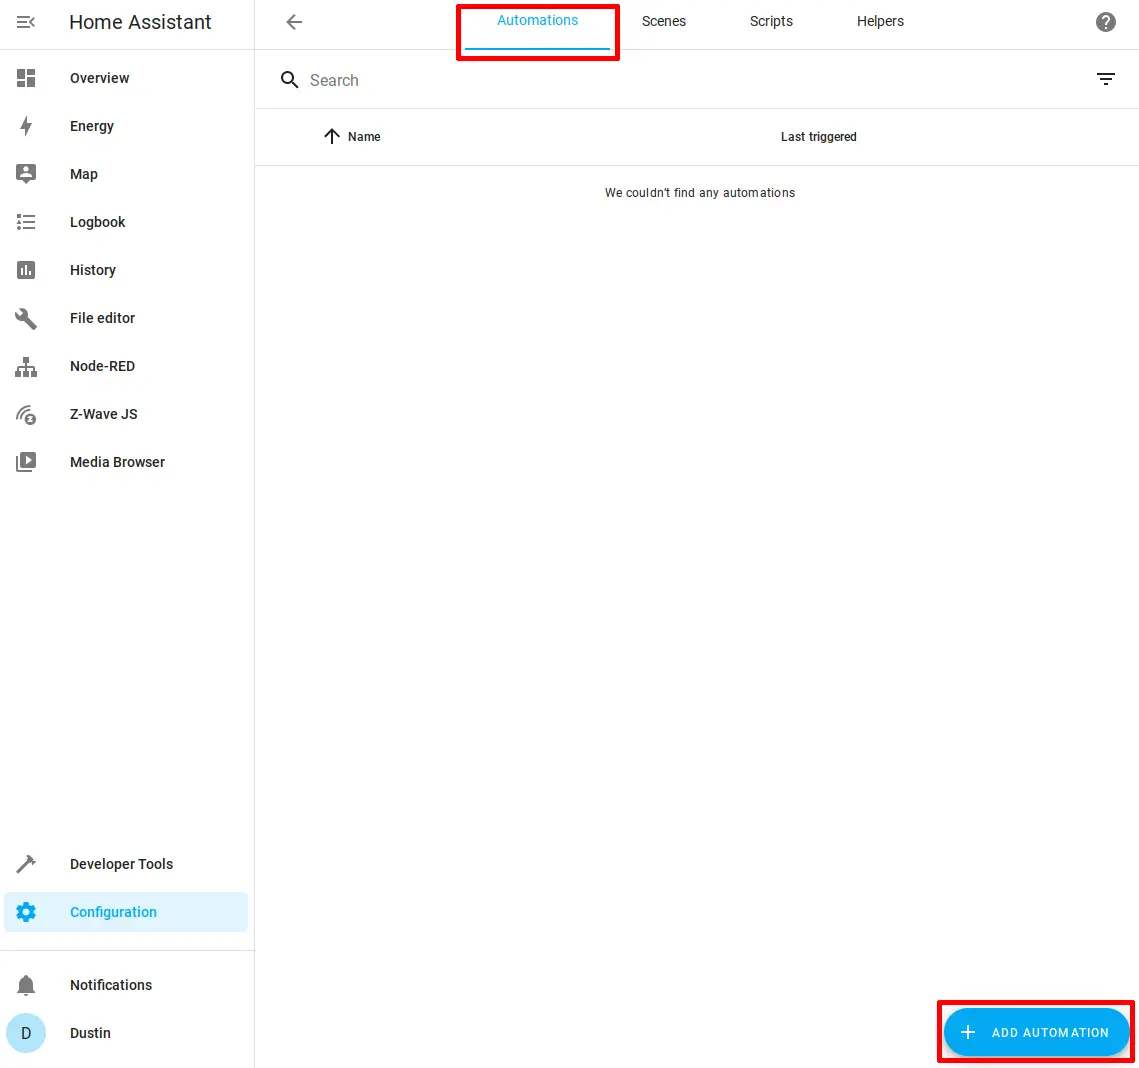
You will be brought to the “Automations” tab by default, and you will see you do not have any automations on a new installation of Home Assistant. Click the “Add Automation” button to get started.
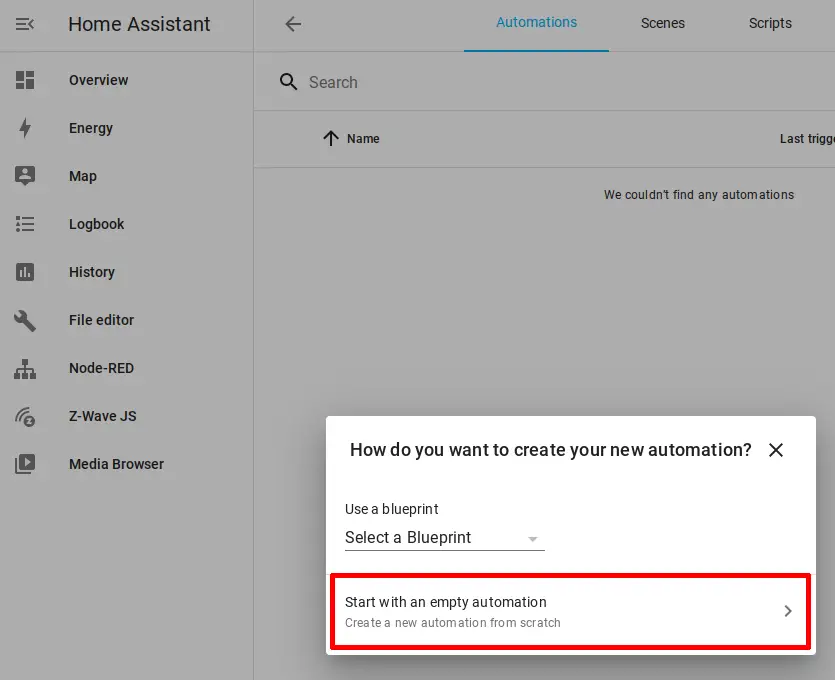
Choose “Start with an empty automation” to start the process of creating a new automation from scratch. Once you get more comfortable with Home Assistant and you do not want to do everything from scratch, there are blueprints you can download to help you set up automations more easily.
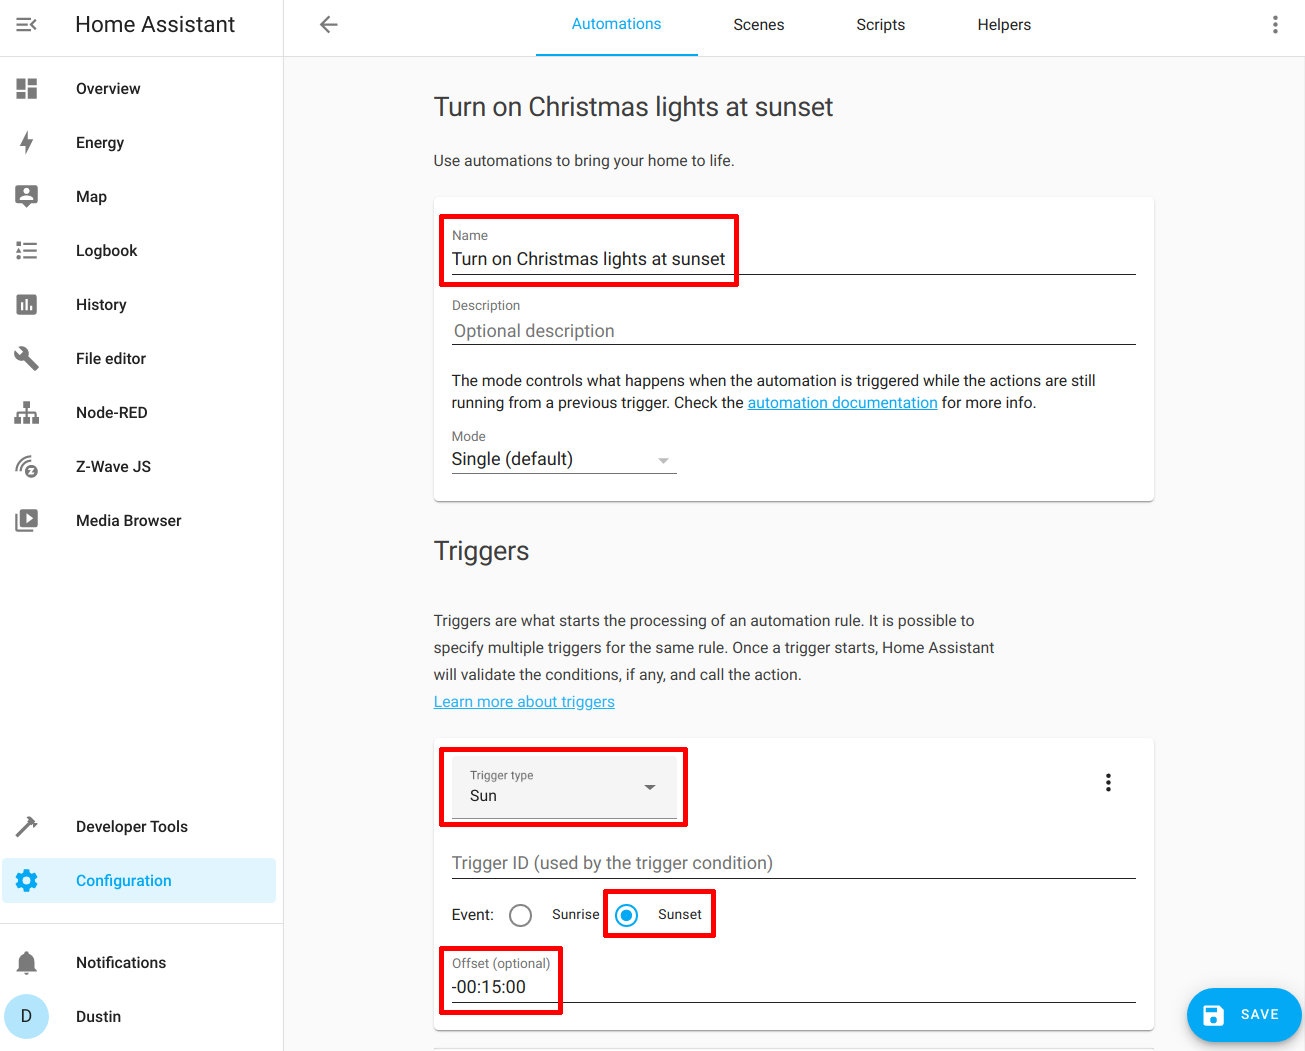
Enter a “Name” for the automation. In this example, I am calling it “Turn on Christmas lights as sunset”. You should use a descriptive name so you will easily know what the automation does from the list of automations. Having several automations called “Turn on lights” would be difficult to maintain.
For an automation to occur, you need to specify a “trigger” which is an event which is used to start the automation. Under the “Triggers” section for the “Trigger type”, choose “Sun”. It should be a built-in type that is automatically available in Home Assistant. Choose “Sunset” since it will default to “Sunrise”. If you desire, you can set an offset to the sunset time. I decided to set my lights to turn on 15 minutes before sunset since it starts getting dark enough before sunset to start enjoying the lights. If you want the time to be before the sunset time, use a hyphen/minus sign before the time. The time format is “hours:minutes:seconds”.
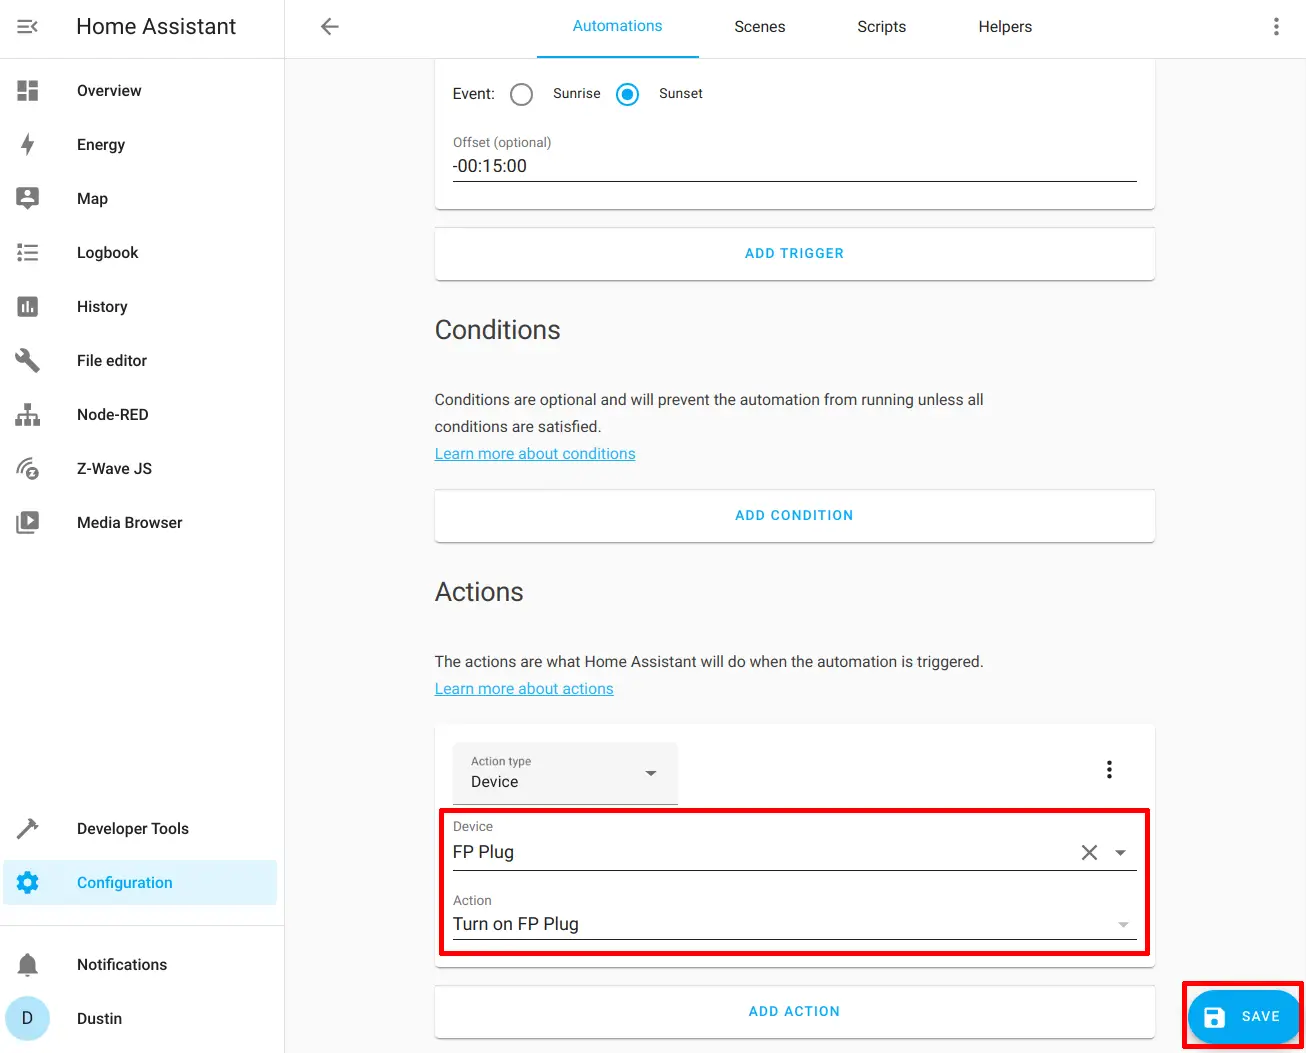
Scroll down the page to the “Actions” section. Once the automation is triggered, you need to specify what you want to happen in the “Actions” section. In this example automation, the lights need to be turned on. I have the lights plugged into a Z-Wave plug, but you could use another type of switch which turns the power on/off. The “Action type” of “Device” should be set by default. Click on the dropdown for “Device” to select the plug/switch. I have mine named “FP Plug” which is short for “Front Porch Plug”. Once you select the device, you need to select the “Action” on the device. In the dropdown, select the option which says “Turn on <name of your device>”. The name of your device will be a part of the “Turn on” and other actions so in this example, I selected “Turn on FP Plug” but yours will be named differently.
Finally click “Save” to finish the automation!
Test the Automation
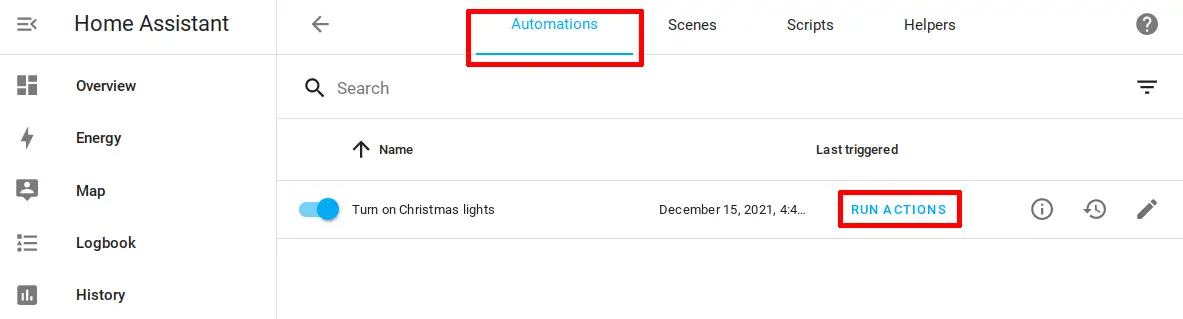
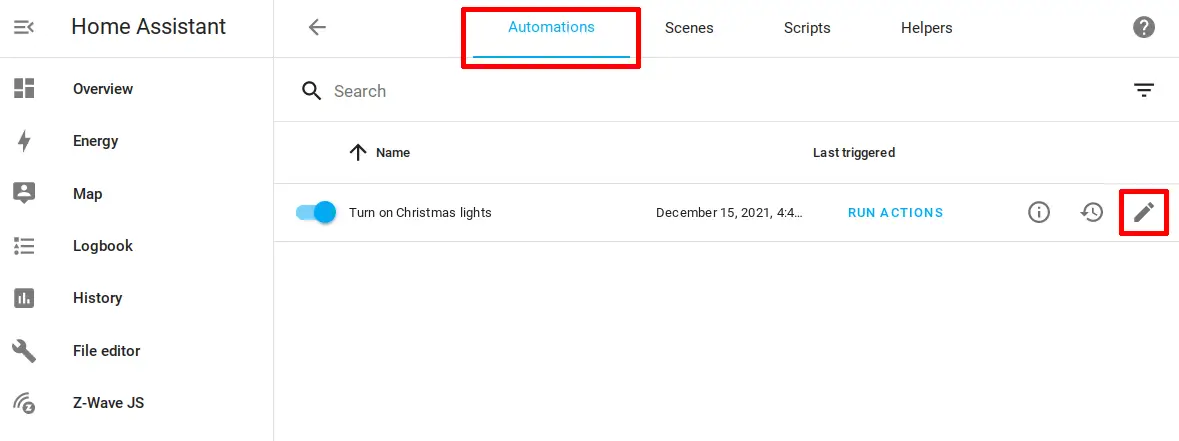
While you may wait until sunset to see if your automation works, you can trigger it right away to test out if the actions are performed correctly. To test the new automation, go back to the “Automations” tab to see the list of automations. Click on the “Run Actions” link to trigger the automation. If all goes well, the lights should turn on. With the actions working properly, it is a matter of time before you will see if the sunset trigger works properly.
Note: If you want to know when the sunset time will occur, you can go to the “Configuration > Devices & Services” page and click the “Entities” tab. On that page, scroll to the “Sun” entity. Click anywhere on the row to open a dialog box. Finally, click on the “Control” icon in the upper right hand corner. It will list the sunset and sunrise time. Now you will know the exact time when the automation should trigger.
Disabling the Automation
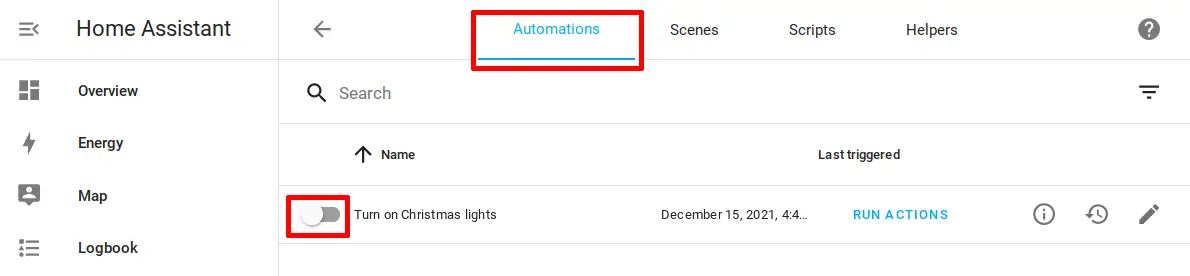
When Christmas is over, you could choose to disable the automation and save it for next year! To disable the automation, click the toggle button to the left of the automation name in the “Automations” tab. This essentially lets you keep the automation but turn it off for later use. Disabling the automation would be convenient for Christmas lights so that you do not need to recreate the automation next year.
Deleting the Automation
After creating an automation, it is useful to understand how to delete it when you no longer want to use it. The Christmas light automation is an example of one you may delete when it is no longer needed especially if you decide to do something different next year. The delete option is a little bit buried so it is not immediately obvious how to delete an automation.
On the “Automations” tab, click on the edit icon for the automation.
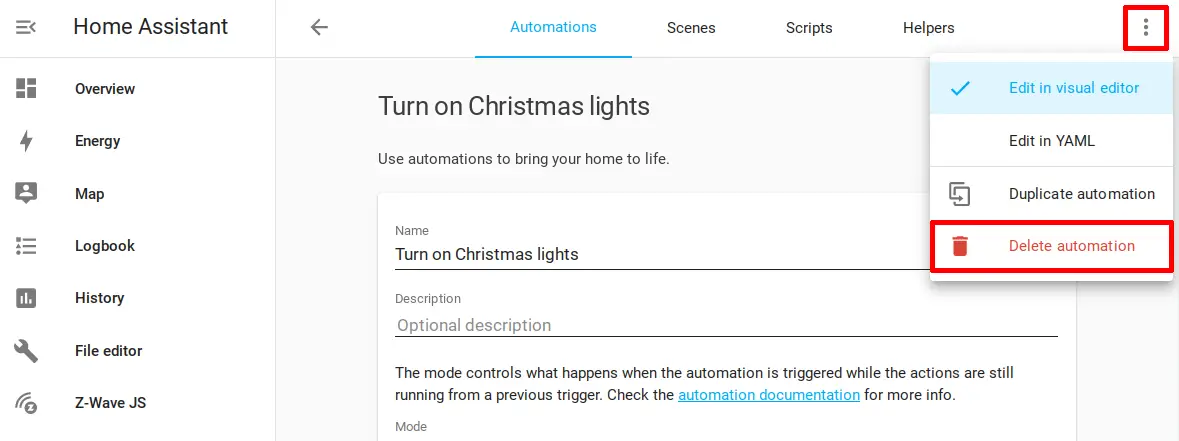
Then click on the 3 dot menu button. Select “Delete automation” to delete your automation.
Related Posts

Set up Z-Wave in Home Assistant
Once you have a fresh Home Assistant installation up and running, you will likely want to dive into configuring your smart home devices.
Read more
How to Install Home Assistant on Proxmox
Home Assistant is a home automation software that is often installed on single board computers (SBCs) such as the Raspberry Pi because the system resources required by Home Assistant are low enough that a SBC will be sufficient for many users.
Read more
How to Set Up Ecosense RadonEye in Home Assistant using a Raspberry Pi as a Bluetooth Proxy
Radon is a dangerous radioactive gas that can be problematic in homes since the gas may concentrate to hazardous levels, which can increase the likelihood of lung cancer over an extended period of time of continual exposure.
Read more